Mold and Home Renovations: Preventing and Addressing Mold During Remodeling

Managing mold removal from home during a renovation is daunting, but it’s also an opportunity to ensure a healthier living space.

Nothing holds up a remodeling project like finding mold right in the middle of it. Continue reading for pro tips about mold prevention, signs of mold and where to find it, and what you should do if you do run into this fuzzy fiend during a renovation project.

Mold prevention

Mold often catches homeowners off guard during renovation projects, and it presents unexpected challenges that significantly disrupt timelines. To proactively tackle this issue, it’s best to prevent mold from growing in the first place. Here are five effective strategies for mold prevention in your home.

  1. Clean up wetness immediately

You can’t talk about mold prevention without discussing moisture. Mold thrives on dampness, making wet walls and floors prime targets.

Basement seepage from heavy rain, a leaky pipe buildup, or a carpet spill requires quick drying within 24 to 48 hours to eliminate the possibility of mold growth. In cases of flooding, promptly discard any water-damaged carpets, bedding, or furniture that can’t be thoroughly dried.

Even everyday events require vigilance — avoid leaving damp items scattered around the house, and dry floors and walls promptly after showering. Don’t forget about damp clothes lingering in the washing machine, as mold will quickly take hold. Instead, hang them to dry, preferably outdoors or in areas with good air circulation.

Additionally, keeping indoor humidity levels below 60% is another way to ward off mold. Use dehumidifiers in particularly humid areas of your home, such as basements or bathrooms, to create an environment less conducive to mold growth.

  1. Proper ventilation

Improving air circulation and ventilation is crucial for managing the moisture levels within your home. Consider installing heating and cooling system vents alongside ceiling fans to keep the air flowing smoothly. Exhaust fans are fantastic for whisking away excess moisture right from the source and redirecting it outside where it belongs. 

Remember to keep internal doors open, especially if there are return air grilles present, allowing air to freely circulate between spaces.

Inspect your crawlspace to see if it’s adequately ventilated. If not, add vents at each corner to encourage better airflow. Don’t forget about the attic too — installing vents strategically where the roof overhangs the walls will help cooler air breeze in, while vents at the roof’s peak release any trapped heat. Proper ventilation is your secret weapon in the battle against mold.

  1. Monitor the temperature

Ever noticed how condensation forms when something cold meets warm, humid air? It’s a cool science experiment, but less desirable when it leads to condensation buildup in your home. To avoid that, try warming up those chilly surfaces. Adding insulation to cold spots not only boosts their temperature but also helps air circulate better throughout your home.

Man on ladder cleaning roof of house for mold removal, restoration, and prevention
  1. Roof gutters

A mold problem can be as simple as a roof leaking due to overflowing or faulty gutters. Have your roof gutters cleaned and evaluated for damage quarterly. Repair them as needed and keep a look out for water stains after storms, which likely suggest a leak.

Properly functioning roof gutters also help direct rainwater away from your home’s foundation. This reduces the risk of water seepage into basements or crawl spaces, which creates the ideal conditions for mold growth. By keeping your roof gutters in good condition, you’re protecting your roof and safeguarding your home against mold.

  1. Indoor humidity

According to the EPA, keeping indoor humidity levels between 30 and 60% is key. Using a moisture meter, simply insert the probe into the material you want to test. The device will provide a reading indicating the moisture content.

Keep an eye out for those trouble spots in your home. If you spot condensation forming on windows, pipes, or walls, it’s a surefire sign that humidity levels are getting out of hand. Don’t sweat it, though — simply dry off those surfaces and address the source of the problem.

Where mold might be lurking

While we’ve discussed effective methods to prevent mold growth in your home, let’s face it, sometimes mold sneaks in despite our best efforts. If you’ve inherited a home with existing mold or you’re trying to be thorough before diving into a renovation project, here are some key areas to check for mold’s presence.

Bathrooms

Peek behind your bathroom cabinets and mirrors — you’ll be surprised at what’s lurking there. With all the moisture hanging around, it’s no wonder toxic mold loves to set up camp in these spots. Consider installing ventilation to tackle this issue head-on. And here’s a tip: always remember to click on those vents during showers to keep excess moisture in check.

Keep an eye out for plumbing mishaps such as spills or leaks; although they seem minor at first, they have the potential to cause major mold issues over time. Addressing these issues promptly will help prevent mold growth and maintain a healthy environment in your home.

Laundry rooms

Wet clothing sitting around in the laundry room will really amp up the moisture levels in the room. Washing machines churn out moisture like nobody’s business, creating the perfect breeding ground for mold.

Even though laundry rooms seem squeaky clean, they’re very vulnerable to mold, especially if humidity levels are through the roof and clothes aren’t drying fast enough. Keep mold in check by giving your appliances a regular clean and keeping an eye out for any sneaky leaks behind the washing machine.

Crawlspaces

Crawlspaces are hidden playgrounds for mold. Since they’re rarely visited, they are the perfect spot for mold to grow undisturbed. Don’t let your crawlspace become a mold haven. Instead, make it a habit to give it a once-over every couple of months. Sweep out the dust, check every nook and cranny, and keep an eye on the corners, walls, ceiling, and floor to ensure mold doesn’t stand a chance.

Air conditioner

Mold also loves to take root in air conditioners. The temperature differences often lead to condensation, while their circulation of dusty air further facilitates mold development. Ensure your air conditioner’s filters are regularly cleaned and mold-resistant to mitigate this risk.

Conduct routine inspections for any signs of mold. If mold is detected, turn off the unit, use a mask to avoid inhaling spores, and thoroughly clean it using a damp cloth, vacuum, and appropriate mold cleaner.

Two men in protective gear and masks carrying out mold removal, restoration, and prevention work in a room

Signs of mold

Don’t let the excitement of renovations overshadow the importance of keeping an eye out for mold. As you dive into your project, be mindful that mold could be lurking in hidden corners waiting to be uncovered. Keep an eye out for these telltale signs that it’s time to hire professional mold restoration.

Odor

Mold is often identified merely by a persistent, musty odor. If you don’t see mold but detect an unpleasant odor, contact a mold restoration team to find the source of the stink.

Discoloration

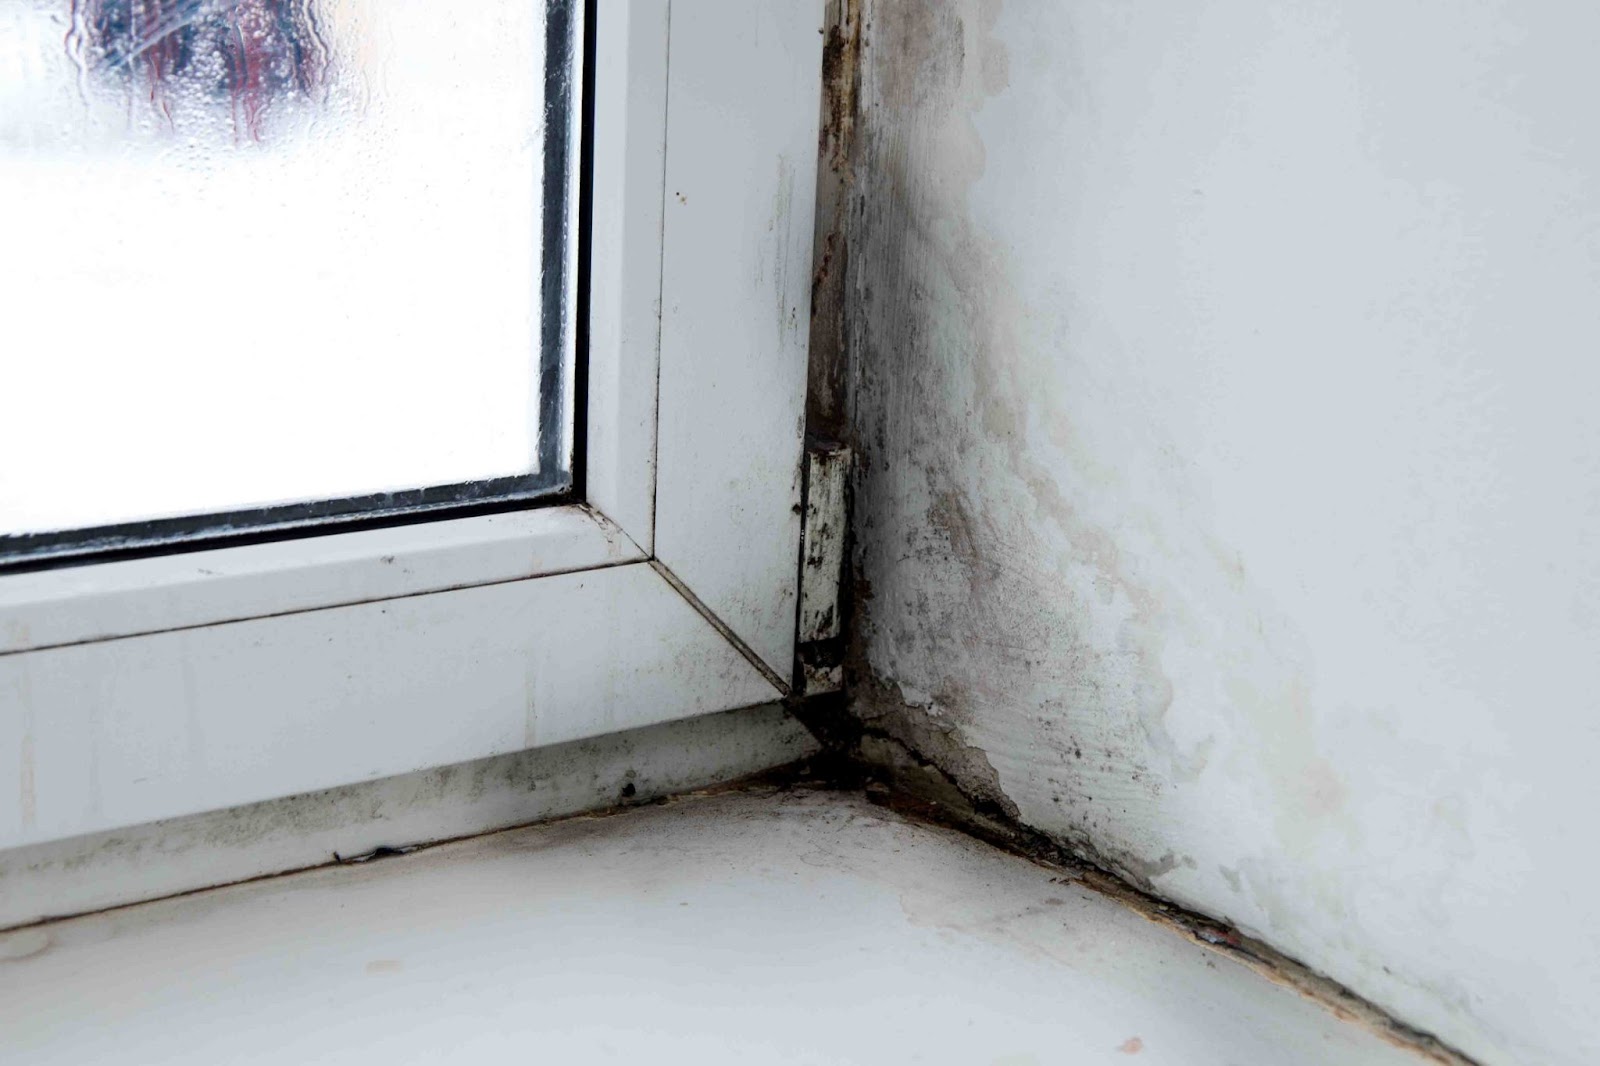
Visual indications are typically the first signs of mold development. Mold usually appears as gray, black, green, or blue patches on walls, ceilings, or other surfaces. It also has a powdery or fuzzy appearance.

Health symptoms

Inhaling mold spores can cause respiratory infections, allergies, fever, chest discomfort, bloody coughing, and other health issues. If you feel increasing weariness, difficulty breathing, coughing, wheezing, and other symptoms, have your house checked for mold.

Bubbling paint

Bubbling or peeling paint does not usually indicate a mold problem, although it may suggest moisture intrusion. Mold sometimes causes bubbling on both the baseboard and the wall.

Damp areas

If any surfaces seem wetter than they should, it’s likely an indication of mold developing behind the scenes. Wet walls, floors, furniture, ceilings, or cabinetry may indicate a high humidity level, a leak, or another water problem. Excess moisture causes mold to grow and spread.

Dealing with mold discovery: next steps

Navigating mold removal from home is no easy feat and often demands specialized expertise. That’s where mold restoration services come into play. The leading mold treatment companies employ a meticulous, multi-step process aimed at restoring fungus levels to normal while devising strategies to prevent future outbreaks.

Mold cleanup service teams typically follow these essential steps:

  1. Inspection – The first step is to thoroughly investigate the property to identify the extent and severity of the mold infestation. Moisture meters, thermal imaging, and other techniques are used to detect hidden mold behind walls, ceilings, or beneath floors.
  2. Getting samples – The team will collect mold samples to determine the type and severity of contamination. This information is utilized to develop an appropriate remediation strategy.
  3. Containment – Next, the team will deploy containment methods to prevent mold spores from spreading to unaffected areas. They will close off the afflicted area using plastic sheeting and employ negative air pressure equipment.
  4. Protective uniforms – Team members will wear appropriate personal protective equipment such as respirators, gloves, and suits to guarantee their safety.
  5. Removal – The mold will next be physically removed from the affected surfaces by the cleanup personnel. Moldy debris and rubbish are properly packaged and disposed of according to local standards. This helps avoid cross-contamination.
  6. Drying – The team will address underlying moisture issues by drying the affected areas and installing dehumidifiers. This treatment is crucial to preventing further mold development.
  7. Prevention – The specialists will provide recommendations to help prevent future mold concerns. This may include improving ventilation, repairing water leaks or moisture problems, and offering advice on how to maintain consistent interior humidity levels.

Reach out to Black Diamond Water Damage & Disaster Restoration today

Proper mold removal from home isn’t a DIY job — it takes know-how, appropriate training, and specialized gear. That’s where a top-notch mold remediation company like Black Diamond Restoration comes in handy. We’ve got the skills and tools to tackle mold problems head-on and make sure they don’t rear their ugly heads again. So, when it comes to bidding farewell to mold, leave it to the pros!

Black Diamond Restoration dominates the business as far as mold restoration is concerned. We are prompt, trustworthy, and efficient in all that we do. If you see or suspect mold development in your house, please contact us.

Reach out to Black Diamond Restoration today to find out more! We serve the Salt Lake and Utah Valley regions from our Murray, Utah, headquarters. Put Black Diamond Restoration to work immediately to eradicate your mold problems.

Preventing Smoke Damage: 11 Tips for Fire Safety and Preparedness

Fire safety is non-negotiable for homeowners and renters alike—heed these expert tips from disaster restoration experts to safeguard your home.

Fires are a nightmare — leaving behind chaos and the stubborn remnants of smoke damage. With a little know-how and preparedness, you will be ready to fight back. We’re diving into 11 expert-backed tips to keep your home safe from the flames and the aftermath.

Why is home fire preparedness so important?

Fire preparedness is your best defense against the chaos of a house fire. Fires pose an immediate threat and leave behind a mess of persistent smoke damage. The aftermath is tough—from losing precious belongings to disrupting your routine. By taking simple steps like having smoke detectors and an escape plan, you’re protecting your home and safeguarding your peace of mind.

  1. Install and maintain smoke alarms

Did you know that having smoke alarms slashes your risk of dying in a fire by almost half? These smart devices sniff out unusual amounts of smoke or invisible gasses that signal trouble. They’re trusty sidekicks that detect both slow-burning and roaring fires. 

Smoke alarms are a simple precaution to keep you and your loved ones safe day and night. Consider these key pointers:

  • Install smoke alarms on every level of the home, inside all bedrooms, and outside each sleeping area. Alarms are wired together, so if one sounds, they all sound.
  • Keep your smoke alarms clear of cobwebs and dust by giving them a monthly vacuum.
  • Check your alarms monthly using the handy test button.
  • If your smoke alarms run on batteries, swap them out annually to guarantee reliable performance.
  • Ensure smoke alarms are positioned at least 10 feet from the kitchen to prevent false alarms.
  • Remember to replace your alarms every 10 years to maintain effectiveness.
  1. Create a fire escape plan

Preparing for a fire emergency involves having a comprehensive fire escape plan. A small fire can grow out of control instantly; in most cases, you only have about two minutes to exit. Smoke alarms sound the warning, but they’re only effective if you know how to safely exit the house. 

Sit down with your family or household members to create a detailed escape route. Identify primary and alternative exits from each room. Then, turn those plans into action with regular fire drills. Designate a meeting point outside the property for everyone to safely gather after evacuating.

Next, establish a family emergency communications plan. Every member of the household should know who to contact if they’re unable to locate one another during an emergency. By having a designated point person and clear communication channels, you will stay connected, even in the most challenging situations. Also, make sure everyone knows how to call 9-1-1.

  1. Invest in fire extinguishers

Fire extinguishers help contain small fires before they escalate into major emergencies. While they are primarily used to suppress or extinguish fires, extinguishers indirectly help prevent smoke damage by intercepting fires from spreading and escalating. When a fire is extinguished promptly using an extinguisher, the amount of smoke produced is limited.

Store extinguishers in easily accessible locations throughout your home, such as the kitchen, garage, and near potential fire hazards like the fireplace or electrical panels. Make sure everyone in your household knows how to operate a fire extinguisher correctly by following the PASS technique:

Pull the pin, aim at the base of the fire, squeeze the handle, and sweep from side to side.

If you follow this technique and the fire does not decline immediately, drop the extinguisher and escape the house right away.

  1. Maintain appliances and electrical systems

Keeping your appliances and electrical systems in tip-top shape is a must to prevent smoke damage and fire risks. Give your stove, oven, and heaters a once-over regularly to verify they work properly.  Don’t forget about electrical outlets and wiring, too—keep an eye out for any signs of damage or wear and fix them quickly.

Steer clear of overloading outlets and using frayed cords. When unsure, it’s wise to enlist the help of professionals for a thorough check-up and any needed repairs. Your safety is worth the investment!

  1. Practice safe cooking habits

Cooking is the number one cause of residential fires. As such, practicing safe cooking habits is critical. Here are a few tried-and-true tips to lower the chance of starting a fire while cooking:

  • Always stay close when something is cooking on the stove.
  • Clear away any clutter and flammable items from your cooking zone.
  • Have a fire extinguisher handy, just in case.
  • Turn pot handles toward the back of the stove to avoid any accidental spills.
  • Roll up your sleeves or change into a different shirt without loose sleeves and excess fabric that easily catches fire.
  • Remove jewelry before turning the heat on.
  • Be cautious with cooking oils, and always research the smoke point for the oil you’re using.
  • Immediately turn off the oven or stove as soon as you’re done cooking.
  • Keep your little ones and furry friends out of the kitchen when you’re whipping up something delicious.

By following these simple yet effective tips, you will significantly reduce the risk of cooking-related fires in your home. Remember, safety always comes first in the kitchen. Stay vigilant, keep your cooking area tidy, and prioritize fire safety practices to guarantee a secure and enjoyable cooking experience for you and your loved ones.

Fire-engulfed area with smoke detector, emphasizing need for smoke damage restoration
  1. Exercise caution when heating your home

Heating your home comes with inherent fire risks. Be mindful of potential fire hazards as you aim to keep warm in the colder months. If you’re using space heaters, make sure they have automatic shut-off features and are placed at least three feet away from anything flammable. And don’t forget to schedule regular check-ups for your heating equipment, like furnaces and fireplaces, to verify they’re running smoothly and safely.

We’re all for staying warm on a chilly day, but never use your oven or stove as a makeshift heater. Not only does this pose a serious fire risk, but it also leads to dangerous carbon monoxide buildup. Protect yourself and your loved ones by installing carbon monoxide detectors throughout your home—they’ll give you peace of mind by alerting you to any potential threats.

Be mindful of clutter as you warm up. Keep flammable materials like curtains and blankets away from heat sources to minimize the risk of accidents. Finally, make sure everyone in your household is on the same page when it comes to fire safety. By educating them about proper heating practices, you’ll create a cozy, worry-free environment for everyone to enjoy.

  1. Maintain safety during holidays

Holiday gatherings are a time for celebration and creating cherished memories, but they also present increased fire hazards. Prioritizing fire safety will help you have a fun and safe get-together, no matter the celebration.

When decorating your home, choose flame-resistant materials for your decorations, including lights, garlands, and ornaments. Inspect all electrical decorations for damage before use and avoid overloading electrical outlets or extension cords.

Candles are a common element of holiday decor, but they pose significant fire risks if not used properly. Keep candles away from flammable materials and never leave them unattended, especially if there are children or pets present. Consider using battery-operated candles as a safer alternative to traditional candles.

As holiday gatherings often involve cooking elaborate meals, it’s crucial to practice safe cooking habits. Stay in the kitchen while cooking, use timers to remind yourself of cooking times, and keep flammable items away from heat sources. Have a fire extinguisher readily available in the kitchen and ensure all guests are aware of its location and how to use it.

By following these fire safety tips, you’ll enjoy a festive and worry-free holiday gathering with your loved ones.

  1. Keep flammable materials secure

Next, let’s focus on fire safety around the house, particularly when it comes to storing flammable materials like gasoline, propane, and cleaning products. Keep these items in approved containers, well away from any sources of heat or ignition, preferably in a ventilated area outside the main living space.

Don’t forget about combustible materials, too, like paper, cardboard, and fabrics. Keep them clear of anything that produces heat or has an open flame to minimize the risk of fire.

  1. Keep children safe

Education is crucial to helping your children stay safe from potential fire hazards. Start by childproofing your home and store matches and lighters securely out of reach. Teach children about fire safety early on, emphasize never playing with matches or lighters, and teach them what to do in a fire emergency.

Supervise children closely around heat sources like stoves and fireplaces and establish clear rules about staying a safe distance away. Encourage them to notify an adult if they smell smoke and practice fire drills regularly to guarantee everyone is prepared to respond swiftly in an emergency.

Red and white electrical device on blueprint, used by experts for smoke damage prevention and restoration
  1.  Close doors during a fire

Shutting doors might seem like an insignificant feat, but it makes a massive difference in a fire. It helps prevent smoke damage, keeps smoke and flames contained, and gives everyone more time to escape safely. Make it a family rule to close doors behind you during a fire escape, and practice this during your fire escape plan. Every little step helps to keep your loved ones safe.

  1.  Seek professional smoke damage restoration

In the unfortunate event of a fire, prompt and thorough smoke damage restoration will be your saving grace. Disaster restoration experts are crucial for salvaging affected properties and belongings. Trained technicians equipped with specialized equipment effectively remove smoke residues, neutralize odors, and restore your property to its pre-fire condition.

Black Diamond Restoration is your one-stop-shop for smoke damage restoration

If you’ve suffered fire damage and are looking for the best disaster restoration experts in Utah, we have you covered! The experts at Black Diamond Restoration are here to help. We are a market leader in fire damage remediation. Trust our certified experts to get the job done quickly and efficiently.We offer comprehensive, professional services to homeowners and businesses alike. If your property has suffered fire damage, contact Black Diamond Restoration today! Contact us online or call 801-383-0964 to learn more.

The Long-Term Effects of Water Damage on Indoor Air Quality: 9 Things to Know

When it comes to grasping the lasting impact of water damage on indoor air quality, it’s all about diving into the nitty-gritty of cleanup and total restoration.

Long-term water damage has far-reaching consequences beyond visible structural damage. One of the most critical yet often overlooked aspects is its impact on indoor air quality. The long-term effects of water damage pose significant health risks and structural deterioration if not addressed hastily. This article covers everything you need to know about long-term water damage and air quality so you’re prepared to respond quickly when disaster strikes.

  1. Black water

Black water is one of the most perilous types of water damage to encounter. Black water is wastewater containing fecal matter, urine, and other bodily wastes. This nasty concoction can seep into your home from outside flooding or a sewage backup.

Black water isn’t merely dirty; it’s downright dangerous. It’s highly contaminated and poses significant health risks due to pathogens, bacteria, viruses, and parasites. Plus, harmful chemicals and toxins are swimming around, too.

When black water infiltrates your home, it brings along airborne endotoxins — essentially, tiny bacteria particles that cause serious respiratory issues and other health concerns. Contact a certified biohazard technician to eliminate black water in your house for proper cleanup and total restoration.

  1. Airborne contaminants

Since water is a universal solvent, it has the knack for seeping into every unsuspecting nook and cranny of your home. If it wreaks havoc, it will mess with almost anything it touches, from glue and paint to carpets and more. These damaged materials start releasing some not-so-pleasant chemicals directly into your living space.

Solvents and volatile chemical compounds are other effects of water damage. A moist indoor environment promotes the virus growth, bacteria, and other germs, turning your home’s air into a contamination zone.

  1. Mold growth

Mold only requires a few ingredients to flourish: food, moisture, and mild to warm temperatures. When these elements come together, mold spores floating in the air seize the opportunity to spread, thanks to water damage effects.

When we talk about mold’s food supply, it’s essentially anything organic that it can sink its microscopic teeth into. We’re talking about dust, books, papers, animal hair — you name it. Solid materials like wood, particle board, paint, and carpet aren’t safe from mold’s appetite.

Above all else, mold loves moist environments. Mold thrives in wet environments caused by flooding, pipe leaks, leaky roofs, moisture in walls, excessive interior humidity, condensation, and poor HVAC system design and performance. If it’s wet, mold will thrive.

If you catch a whiff of a musty or foul smell that won’t go away, you probably have a mold issue. Take a calculated look around your home, especially when water damage has occurred. Think beneath cabinets, around plumbing fixtures, appliances, flooring, and walls — mold isn’t picky about its hiding spots. Keep your eyes peeled, and if you suspect mold, act fast and address it promptly.

An image showing cleanup and total restoration process after long-term water damage, exhibiting water damage effects
  1. Mold and air quality

Mold, a common water damage effect, is a severe cause for concern in both indoor and outdoor environments. Beyond the visible damage it inflicts on your home and health, toxic mold unleashes invisible havoc. It impacts indoor air quality by spreading airborne contaminants and triggering allergies that affect everyone within the premises.

Mold has a knack for hiding in plain sight, lurking above ceilings, behind walls, beneath floors, and within cabinets, evading detection until it’s too late. Its presence triggers allergic reactions and leads to respiratory and digestive issues. This is why it’s imperative to address water damage promptly and thoroughly.

  1. Mold and health effects

While most people shrug off mold spores without a second thought, it’s worth noting that around 10% of the population isn’t so lucky — they’re hit hard with severe allergy symptoms. Respiratory issues, nasal/sinus congestion, watery eyes, sore throat, coughing, and skin irritation indicate a potential mold problem. And, if you have asthma, mold might trigger serious episodes.

Certain people are at even greater risk when it comes to mold exposure — infants, kids, seniors, pregnant women, folks with respiratory problems, and those with weakened immune systems. Even if you’ve been cruising through life without any mold-related symptoms, prolonged exposure might suddenly trigger an allergy.

It’s essential for everyone to take steps to avoid exposure to mold spores until cleanup and total restoration are complete. It’s better to be safe than sorry when it comes to dealing with sneaky mold.

  1. Mold removal

Mold spores are always around us, waiting for the perfect moment to strike. They are undetectable to the human eye and can remain in the air forever. Even a light wind will readily transport them long distances and into houses and structures.

Mold removal helps improve indoor air quality while also lowering health risks. Here are some techniques for removing mold from the air:

  • Air purifier – Use an air purifier to capture mold spores in the air and keep them from spreading.
  • Dehumidifier Mold thrives in wet conditions, thus lowering humidity will help prevent mold growth. A dehumidifier removes excess moisture from the air.
  • Clean – If mold forms on surfaces, clean them immediately to avoid further growth. Wear gloves and a mask to avoid inhaling mold spores while cleaning. Clean surfaces with a solution of water, bleach, vinegar, or hydrogen peroxide.
Female sitting on floor, hand covering face. Addressing long-term water damage effects
  1. Controlling mold growth

Maintaining a dry, pristine environment works wonders in keeping mold infestation and spore levels at bay. Moisture management is the name of the game. To really handle mold, your first step is tackling any pesky moisture issues lurking around. Mold spores are equal opportunity settlers, waiting for a damp surface to call home.

Start by giving any moisture-prone areas, like sinks, washing machines, and toilets, a good scrub down and dry-off. Next, fix plumbing and roof leaks quickly and examine them regularly. Within 24 hours, dry off any water-damaged areas. For serious flooding, contact a licensed restoration specialist.

  1. Cleaning up water damage

Those with respiratory issues like asthma or weakened immune systems should steer clear of moldy areas and sit out the flood cleaning activities. If you’re unsure about diving into flood cleanup, it’s always wise to chat with your healthcare provider for some expert advice.

Flood cleaning is challenging and often hazardous. Before you jump in, take a moment to unearth any potential hazards lurking in your flooded abode. The professionals are often your best bet here. They will give you the lowdown on whether stepping foot in your home is safe and offer guidance on the cleanup process.

  1. Other issues from long-term water damage
  • Pathogen contamination – Pathogen contamination occurs especially if filthy, pathogen-laden water enters the residence.
  • Infestations – Many bugs are drawn to and seek out standing water.
  • Ceiling damage – Long-term water damage typically harms ceilings. This might cause a ceiling to fall unexpectedly, potentially hurting everyone nearby.
  • Electrical – Water damage effects also have an impact on electrical systems. Short circuits, flames, and electrocution are typical hazards. These hazards are produced by a faulty electrical system or malfunctioning electrical appliances. Following floods or other serious water damage, a qualified electrician should switch off the home’s electricity.
  • New odors – Water damage causes musty odors. Some surfaces grow stinky quite quickly after being exposed to water.

Contact Black Diamond Water Damage & Restoration today

Despite your best attempts to safeguard your property from water, flooding might still inflict significant damage. The professionals at Black Diamond Water Damage & Disaster Restoration are here to assist with cleanup and total restoration.

We work relentlessly to resolve difficulties, such as flooding, fire damage, storm damage, mold treatment, sewage backup, and biohazard cleanup. Feel certain that our expert personnel will assist you in restoring your home or commercial space to the highest possible standards.

Black Diamond Water Damage & Disaster Restoration is here to assist you with all your storm damage restoration requirements. We’re prepared to act quickly and efficiently with over 20 years of catastrophic repair experience. Contact Black Diamond Restoration now to learn more!

14 Items You Need in Your In-Home First Aid Kit

Are you curious about first aid kits and wondering, “What does a first aid kit have?” Let’s explore the essentials together!

You cut your finger while prepping dinner, stubbed your toe while rearranging furniture, and your son had a bee sting allergic reaction while playing in the backyard. Adhering to the Boy Scout motto, “Be prepared,” will help you in all these circumstances.

In any home, having a well-stocked first aid kit is a must. You never know when accidents might happen, so having everything you need on hand makes a big difference when someone gets hurt. From minor scrapes to more serious injuries, having the right supplies in your first aid kit is a lifesaver.

So, let’s dive into the importance of a first aid kit at home to make sure you’re ready for whatever comes your way!

Home first aid kit bandages, antiseptic wipes, scissors, gloves. Essential for emergencies

First aid kits 101

A first aid kit is a collection of essential medical supplies and equipment compiled to provide immediate care for injuries and medical emergencies. These kits typically contain bandages, antiseptics, adhesive tape, scissors, and pain relievers.

A well-stocked at home first aid kit allows you to respond efficiently to common injuries and situations. Consider purchasing a compact travel-size first aid kit for outings to the park, pool, or when you’re on vacation. For example, if you’re going camping, you might include additional sunscreen, burn treatment, bug repellant, and bite lotion.

Knowing the safest place to store a first aid kit is as important as what you put inside. Your kit should be kept in an area easily accessible in an emergency but out of reach of small children. In addition, you should place a travel version in each of your cars.
Various types of first aid kits are available, each designed to cater to specific needs and situations. Basic first aid kits contain essential supplies for treating minor injuries. Travel kits are designed for use on the go. Sports kits are tailored for athletes and sports enthusiasts. First aid kits should not be confused with survival kits geared towards sustaining life during disasters. 

Applying an emergency kit to a leg. Importance of having a first aid kit at home

Consider taking a first-aid course with the American Red Cross to get the most out of your first aid kit. To learn more about courses, contact your local chapter. Prepare children for medical situations in an age-appropriate manner as well. Teach them the importance of a first aid kit at home and how to use its contents.

First aid essentials

What does a first aid kit have exactly? Here are several essentials to stock yours with:

  1. Antiseptics

Keeping a wound clean helps prevent infections by reducing germs and bacteria. To prepare your cleaning kit, include a handful of antiseptic wipe packages, alcohol pads, and bug bite swabs.

Alcohol wipes are ideal for sterilizing equipment and maintaining a germ-free makeshift first-aid station, but they are not used to clean wounds. Alcohol injures tissue and slows healing in exposed wounds.

The simplest approach to clean an open wound is to use warm, soapy water or to run clean water over it for a few minutes. If you don’t have access to clean water, sanitize the wound using alcohol swabs.

  1. Ointments

Antibiotic ointments and hydrocortisone cream are beneficial to toss in your at home first aid kit. Antibiotic ointment helps prevent infection in minor cuts, scrapes, and burns. Common examples include Neosporin or Bacitracin. Hydrocortisone cream reduces itching, swelling, and irritation from insect bites, rashes, and minor skin irritations.

  1. Gauze

Gauze is a versatile first-aid supply. It prevents bleeding, keeps a wound dry, and serves as a bandage pad. The distinction between dressings and gauze bandages is that gauze permits airflow into the wound, whereas most dressings do not. Include a range of gauze designs and sizes in your bag, such as gauze roll bandages and medium and large sterile gauze pads for maximum preparedness.

  1. Tape

Surgical tape is paramount for holding bandages and gauze in place. Not every bandage is self-adhesive, and some adhesives simply don’t work well. Include one sticky cloth tape (about 10 yards long and 1 inch wide) with your kit.

  1. Thermometer

A thermometer is essential for monitoring body temperature, which may indicate fever or illness. By having a thermometer readily available, you can quickly assess someone’s health status in case of illness or injury. Avoid using glass thermometers because of their shatter factor. If your thermometer requires batteries, include an extra pair.

  1. Emergency contacts

Quick access to important contact information is crucial in a medical emergency. Your emergency contacts list should include numbers for local emergency services as well as contact information for family members, friends, or neighbors to provide support during an emergency. 

Additionally, include any pertinent medical information such as allergies, medications, and existing medical conditions for each household member.

  1. Scissors

Scissors help cut bandages, gauze, adhesive tape, or clothing to access and treat injuries. Scissors are also effective for removing splinters, cutting medical tape, or trimming dressings to fit properly. Choose a pair of small, sharp scissors with rounded safety tips, and make sure they are easily accessible within your first aid kit for quick use.

A woman in a cars back seat wrapped in a blanket
  1. Emergency blanket

Have you ever wondered why there’s an emergency blanket in first-aid kits instead of something cozier? Well, it’s not your ordinary blanket. Think of it more like a huge, thin sheet of aluminum foil — it’s designed to regulate body temperature, thanks to NASA-inspired tech. This comes in handy during emergencies, long electrical outages, or when dealing with certain health conditions.

  1. Bandages

There are two basic types of bandages: elastic and adhesive. Elastic bandages come in rolls and are used to wrap a sprain wound or to treat edema. Adhesive bandages are single-use and convenient for minor injuries. Both serve distinct purposes in wound care and injury management.

  1. Dressings

Dressings are used while applying pressure to a wound to halt bleeding, minimize blood loss, and clean up oozing. Dressings are often non-adhesive, which is ideal for burns. Add a couple of absorbent compress dressings to your first aid kit for optimal readiness.

  1. Disposable gloves

Medical gloves help prevent the spread of illnesses when treating bleeding wounds. They are essential for protecting the responder and the patient from exposure to blood, bodily fluids, and potentially harmful microorganisms during medical emergencies or first aid procedures. Include several sizes depending on who might be using the kit.

  1. Breathing barriers

A breathing barrier is useful if you need to do CPR, especially on someone you don’t know. While mouth-to-mouth communication may be required to save someone’s life, coming into close contact with their mouth might make you sick if they’re carrying an illness or disease.

Breathing barriers are placed between your mouth and the mouth of the individual you’re performing CPR on. They keep illnesses such as HIV and hepatitis from spreading. Breathing barriers are necessary since these viruses transmit through blood and body fluids, and some people are unaware they are carrying them.

  1. Hot and cold packs

Hot and cold packs provide quick relief for various injuries and ailments. If you’ve bumped your head or taken a spill, these packs will save the day by reducing pain and swelling. Plus, in the event of a power outage, instant heat or cold packets allow you to administer treatment without relying on appliances like the microwave or freezer. 

  1. Other First aid basic care to consider:
  • Nonstick sterile pads
  • Blister treatment
  • Ibuprofen / other pain-relief medication
  • Insect sting / anti-itch treatment
  • Antihistamine to treat allergic reactions
  • Splinter tweezers
  • Safety pins
  • First-aid manual or information cards

How to customize your kit

Contemplate your family’s unique healthcare needs when putting together an at home first aid kit. Here are some examples to consider:

  • If you have older family members with delicate skin, a roll of paper tape will help preserve their skin.
  • If you have a family member with a severe allergy, pack antihistamine medication and an epinephrine injector.
  • If you or a family member has diabetes, pack a juice box, glucose pills and gels, and an emergency glucagon injection kit.
  • Chewable baby aspirin may benefit someone with coronary artery disease if they are not allergic to aspirin.

First aid kit maintenance

Just as you regularly maintain your appliances or car, keep an eye on your first aid kit. Check and maintain it regularly to ensure it remains adequately stocked, up-to-date, and ready for use in emergencies. Clear out any expired supplies and restock the depleted ones.

In addition to checking supplies, consider including a letter in your kit with guidance on where to find other necessary supplies around the house—further emphasizing the importance of a first aid kit at home. This ensures that all household members know where to locate additional resources in case of emergencies so they are prepared and capable.

Call Black Diamond Restoration today

Dealing with an emergency is never fun, but knowing how to answer, “What does a first aid kit have?” will help you plan ahead. In the event of a natural disaster or other emergency, call for restoration help right away. Black Diamond Restoration is the best in the business for handling restoration problems efficiently.

Having a first aid kit on hand will provide you with peace of mind in the event of an emergency. If your house has been damaged by a disaster such as a flood, fire, or mold, we will assist you right away. Contact Black Diamond Restoration today to get started!

Mold in Unconventional Places: Surprising Hiding Spots in Your Home

If you’re wondering where to look for mold in your home, understanding how to identify and eradicate the problem is fundamental.

When we think of mold growth in our homes, we often picture the usual suspects: damp basements, neglected bathrooms, or areas affected by water leaks. However, mold is a stealthy intruder. Mold lurks in unexpected corners and crevices throughout living spaces.

In this blog post, we’ll explore some surprising hiding spots where mold might take hold so that homeowners won’t be caught off guard the next time they see or smell this unpleasant house guest.

What is mold?

Mold, a member of the fungus family, is found both indoors and outdoors. Out in nature, it serves a crucial role in decomposing dead organic matter and keeping ecosystems healthy. However, indoor mold is a different story. Its presence can lead to health issues such as allergies and illnesses.

Mold thrives in moist environments and grows effectively on various surfaces, including wood, carpet, insulation, paper, and food. It’s essential to prevent indoor mold growth to maintain a safe and healthy living environment.

Signs of mold

When you think of mold, you probably imagine dark, damp spaces with fuzzy patches of growth or green blobs that appear on an old loaf of bread. While all of these characteristics are accurate, mold growth extends beyond mere inconvenience; it poses serious health risks and often compromises the structural integrity of buildings.

Here are some signs you have mold in your home:

  • Odor Mold emits a musty, earthy odor. This smell is typically described as damp, stale, or sometimes even sour. It varies depending on the type of mold present and the materials it’s growing on. Hire a specialist to inspect concealed mold colonies in walls, crawl spaces, or home foundations if you smell mold but don’t see any.
  • Water leaks A slow leak might provide enough moisture to encourage mold growth. Regularly inspect all plumbing connections inside and outside the home, fix leaks as soon as they appear, and work to eradicate mold.
  • Squishy floors Squishy floors are concerning and sometimes a sign you have mold in your home. If certain areas of your floor become mushy due to moisture issues in your subfloor, mold may already be growing there. To guarantee complete removal of the mold infestation, contact a professional.
  • Health symptoms – Mold spore inhalation might lead to major health issues, particularly in those with underlying medical disorders. The spores induce respiratory infections and exacerbate asthma symptoms once they enter your lungs. Breathlessness and severe coughing and sneezing are common side effects.
  • Discoloration Discoloration is the most common sign you have mold in your home. Mold is seen as gray, black, green, or blue patches on walls, grout lines, or other surfaces. Look for any streaks of brown, red, or pink. The texture of mold might feel slimy, fuzzy, or powdery. It’s often identified by black water stains on the ceiling, walls, or flooring.
Toothbrush holders

Toothbrush holders

Storing your toothbrush in a glass or ceramic container near the bathroom sink is handy, but here’s the catch: water dripping from the toothbrush creates a prime breeding ground and hiding spot for mold. It loves to hide out there.

To prevent mold from taking over, rinse and dry the inside of your toothbrush holder frequently. And while you’re at it, thoroughly clean your soap dish, including the underside. That way, you’ll keep mold growth in check and maintain a clean bathroom setup.

Under the sink

Underneath most kitchen and bathroom sinks, you’ll find warm, damp, and dark conditions—a mold paradise! To stop mold growth, frequently inspect these areas for any signs of condensation or plumbing leaks. Give the inside of the sink cabinet a good clean using a solution containing hydrogen peroxide or bleach. Regular cleaning will ensure a mold-free environment.

Dehumidifiers

If you’re doing an inspection and wondering where to look for mold in your home, don’t overlook your dehumidifier. It’s a common spot for mold to take hold, especially in the water reservoir or hose.

Cleaning is key to combat mold in your dehumidifier. Make sure to regularly empty, clean, and sterilize the water tanks. If your dehumidifier has a hose, thoroughly rinse and clean it with warm, soapy water. And don’t overlook the filters—clean or replace them according to the manufacturer’s guidelines to trap mold spores effectively.

Dishwashers

Dishwashers are one of the stealthiest hiding spots for mold. Most of us rarely consider dishwashers as possible sources of mold until they break or need to be replaced or serviced. Every dishwasher has two connections underneath it: the water supply and the discharge connection. These are the places where mold and mildew most often originate.

Periodically, the water supply needs to be properly tightened and oiled with the appropriate sealant. Installing the rubber hose and clamp for the discharge connection before the dishwasher is mounted guarantees suitable installation. Over time, hoses deteriorate. It never hurts to check the dishwasher connections if you’re purchasing an older home, particularly if it smells strange when you open the door.

Bathroom mirrors and cabinets

Is there a musty or musky scent in your bathroom? If so, pay close attention to the walls behind the cabinets and mirrors in your bathroom. Because of the retained moisture, hazardous mold develops quickly in these areas and is all too frequent.

Eliminate bathroom humidity by installing ventilation. Vents should be kicked on during all showers to combat excessive moisture. Bathrooms are also vulnerable to plumbing spills, overflows, and leaks, all of which, over time, result in mold damage.

Underneath Flooring

While certain mold strains lurk out of sight, others are easier to spot. Mold is incredibly adaptable and will thrive under floors, remaining unnoticed for years. It’s especially common in homes that have experienced recent water damage.

To minimize the risk of mold growth beneath your flooring, you must keep your home dry and well-maintained. If leaks, floods, or burst pipes occur, take action ASAP. Additionally, clean up any spills on the floor as soon as they occur. Proper ventilation is also key to reducing the risk of mold exposure in your home.

Chimneys

Chimneys

Chimneys are excellent, unsuspecting hiding spots for mold. Water, mud, and other biological debris are gathered in the cracks in brick. Mold grows because of rusty chimney crowns and defective flashing that allows snow and rain to enter.

To combat chimney fold, fix flashing and replace rusty caps first. After that, give your chimney a complete cleaning by hiring a chimney sweep. In addition to cleaning up mold, a yearly chimney sweep maintains your chimney free of harmful creosote and optimizes its performance.

Window sills

 Window sills are prone to retaining moisture after rainfall, creating the perfect environment for mold growth. This mold thrives on the windowsill and poses a risk to structural wood and construction components behind the window. Preventing mold formation is crucial, and you can help by ensuring the windowsill is thoroughly dried after a rain shower.

Keep all windows closed during inclement weather to minimize the risk of rainwater entering your home and reduce the chance of mildew and water damage. Additionally, consider washing the windows annually to prevent significant mold and mildew growth.

Laundry rooms

In the laundry room, wet clothes contribute to overall moisture levels. Washing machines generate moisture that creates conditions favorable for mold growth. Despite being perceived as clean areas, laundry rooms are prone to mold if humidity levels are too high, especially if clothes aren’t dried promptly. To reduce the risk of mold, regularly clean your appliances and check for any leaks beneath the washing machine.

Reach out to Black Diamond Water Damage & Disaster Restoration today

Now that you know where to look for mold in your home, who will you call if you spot mold growth? In Utah, mold removal is a Black Diamond Damage & Disaster Restoration specialty.

Count on our mold removal company to do the job well. We serve businesses and homeowners with comprehensive, expert services. We employ state-of-the-art technology, and our staff members have extensive expertise and are committed to giving you outstanding customer service.

When it comes to mold removal, Black Diamond Restoration leads the industry. Being prompt, trustworthy, and efficient in whatever we do is something we like. If you see or suspect mold development in your home, please get in touch with us.

Reach out to Black Diamond Restoration to find out more! We serve the Salt Lake and Utah Valley regions from our base in Murray, Utah. Put Black Diamond Restoration to work right now to repair your home!

Storm Preparedness: Protecting Your Property from Flood and Water Damage

Dealing with water damage is no one’s idea of fun, but knowing how to protect your house from a flood will make a huge difference in recovery.

Walking into a flood is a nightmare scenario that leaves you anxious, overwhelmed, and full of relentless questions. Fortunately, with the right knowledge and preparation, minimizing the damage, protecting your wallet, and restoring your home ASAP is achievable.

So, let’s dive in! We cover everything you need to know about water and flood damage so you’re prepared to respond quickly when disaster hits. Here’s how to protect your property from water’s wrath.

Flooding: 101

Flooding happens when water exceeds its usual confines and spreads over land that is typically dry. Floods are the second-most widespread natural disaster on Earth, and all 50 states are vulnerable. They often happen during heavy rainstorms, when snow melts too quickly, as ocean waves overflow, when runoff collects in rivers, if a dam breaks, and in various other scenarios.

Some floods build gradually enough that forecasters will predict where they will occur days or weeks in advance. Flash floods, on the other hand, occur within a handful of minutes or hours. Floods might happen in a one-and-done fashion, or last up to days, weeks, or months. With so much ambiguity surrounding flood severity and timing, thorough storm preparedness offers the utmost peace of mind.

Assess your property’s risk

One of the first steps you’ll want to take when preparing for storms is to check out how likely your property is to flood or suffer water damage. Start by assessing if you’re in an area prone to flooding or close to water sources like rivers, lakes, or the coast. Take a peek at flood maps and chat with local authorities to gauge the flood risk in your area and how serious it could be. 

Next, consider how high your property sits and whether it might be vulnerable to storm surges or rising water levels during extreme weather. Take into account the condition of your property’s drainage systems and any potential weak points needing reinforcement to withstand heavy rainfall or flooding.

Property Is To Flood Or Suffer Water Damage

Elevate appliances

Appliances are a key item you’ll want to protect against storm damage. They’re expensive to replace, cumbersome to move, and might exacerbate damage if they’re broken. Make sure all your appliances and electrical utilities are raised above flood level. It’ll save you from a heap of costly damage and keep your place running smoothly after a flood hits.

If you’re in a single-story home or don’t want to lug your fridge upstairs, easily create some makeshift platforms using cinder blocks and wood. They’re easy to put together, take apart, and stash away once the flood danger has passed. And if the floodwaters start creeping up, don’t forget to cut off your home’s electricity before things get wet and risky.

Apply sealants

Sealants are a crucial step to protect your house from a flood and keep water at bay. Start by sealing up any foundation cracks to prevent even a drop of water from seeping in. Grab some masonry caulk or mortar and get to work filling in any gaps you find. If you notice the problem persisting, explore more permanent solutions as time allows.

But we’re not done yet–don’t forget the crevices in your walls, windows, and doors too. While you can’t control the rain, you can certainly take steps to minimize the number of entry points that water will find its way through into your residence. So, apply those sealants and keep your home safe and dry despite the weather.

Invest in a sump pump

Many homeowners have heard of sump pumps, but there’s plenty of confusion surrounding their purpose and capabilities. A sump pump is a device installed in a pit dug at your home’s lowest point, typically in the basement or crawl space. Despite its unassuming appearance, this small addition plays a critical role in preventing basement flooding.

By removing water from the pit and redirecting it to a nearby storm drain, a sump pump effectively prevents groundwater from reaching the level of your basement floor. As they fight off threats like basement flooding and mold, sump pumps are essential. Keep up with regular maintenance, and you’ll be rewarded with a cozy, dry home for years to come.

Utilize foundation vents

Foundation vents offer an alternative solution to sump pumps for managing water and preventing flooding. Here’s how they work: Foundation vents provide pathways for water to flow through your house rather than accumulating around it. This helps relieve pressure on your walls and basement windows while providing an exit route for floodwater.

As warm air rises inside your home, it naturally draws air in through foundation vents from the outside. This helps regulate moisture levels in the foundation, particularly on warmer days, by reducing humidity and maintaining dry conditions. Foundation vents offer a practical and effective way to manage moisture and protect against water damage.

Address leaks promptly

Moisture creeping into your home is a welcoming invitation for mold growth, and that’s definitely not something you want lingering around. Mold is a known allergen linked to asthma and other respiratory issues. With this in mind, pounce on water leaks as soon as you spot them to keep your family safe. 

Keep an eye out for telltale signs of leaks, like water pooling in the basement or suspicious damp patches on your ceiling. Regularly inspect your pipes for any signs of trouble, whether it’s unusual buckling, visible droplets, or signs of corrosion. If you do uncover a leak, don’t wait around—patch it up pronto or call your local experts to fix the problem quickly.

Home To Prevent Flooding

Don’t sleep on yard care

We’ve covered several items to tackle inside your home to prevent flooding, but what about the outside? Taking care of your yard is equally important when you’re aiming for optimal storm preparedness. 

When debris, such as leaves, sticks, and other clutter, accumulate in your yard, they tend to clog drains, gutters, and stormwater systems. Any obstruction that impedes the natural flow of water will cause it to pool in low-lying areas, such as your yard or basement.

Start by giving your drains a thorough clean-out, getting rid of any debris that has accumulated over the weeks. Grab a rake and tackle any leaves and sticks strewn across your yard. Next, a brush or rake will come in handy for removing any stubborn debris and leaves from your storm drains. Once you’ve cleared everything out, simply dump the debris into your yard’s garbage bin.

By regularly clearing debris, you create pathways for water to flow freely away from your home. This helps minimize the risk of water buildup and flooding during heavy rainfall or storms. Maintaining a well-groomed yard with proper grading will help divert water away from your home’s foundation, further minimizing the likelihood of flooding.

Inspect your roof

While you’re outside, take advantage of this time and inspect your roof. Start by checking for cracked bricks, loose mortar, and any signs of leaks in the attic. Then, grab a ladder and climb up to take a closer look at the roof itself. Keep an eye out for damaged, missing, or loose shingles, and don’t hesitate to call in the professionals to repair your roof as needed.

Secure flood insurance

Flood insurance is something you definitely don’t want to overlook, especially since most home insurance plans won’t protect against water damage. With climate change bringing more intense rainfall, you might be at risk of flooding without even realizing it.

But here’s the good news: your home insurance provider can often help you secure flood insurance through either a government program or a private insurer. When you’re figuring out your coverage limits and assessing the value of your home and belongings, don’t forget to factor in the cost of flood insurance along with your regular home policy.

Ensure proper drainage

Drainage is another key component if you want a water-free residence. The ground around your property should slope away from the foundation. Next time it rains, keep an eye out to make sure the water flows away from your home and doesn’t pool up anywhere on your property. If you notice overflowing gutters, soggy ground, or a damp basement, take a closer look at your drainage systems.

To beef up your home’s flood resistance, consider installing backwater valves. These handy devices will help prevent flood water from backing up into your home, adding an extra layer of protection against pesky water damage.

Acquire generators

Generators are absolute lifesavers, especially after a major flood knocks out the power. Waiting weeks for electricity to come back on is no picnic. Not only does it mean food spoiling in the fridge, but it also puts your sump pump out of commission, leaving your basement vulnerable to flooding. Plus, without power, you’re left in the dark – literally and figuratively – unable to charge your phone or connect to WiFi to reach emergency services if needed.

While a whole-house generator is the gold standard for storm preparedness, it’s not always feasible for everyone’s budget. That’s where portable generators come in handy. Depending on the size and cost, hook up enough electricity to keep essential appliances like your fridge, sump pump, and lights up and running. It’s a game-changer for keeping your home functional and comfortable, even when the power’s out.

Prep some sandbags

Sandbags are a lifesaver in times of water trouble, so if you have access to them, it’s worth dusting them off before a storm. However, keep in mind that filling sandbags might be more time-consuming than you might think.

While it’s ultimately the responsibility of the property owner to acquire and fill sandbags, your local government may have resources or plans in place to assist you. They might even provide sandbags and sand themselves. To find out more about your options and where to get sandbags, reach out to your city or local authorities for guidance.

Don’t hesitate! Reach out to Black Diamond Restoration today

Despite your best efforts to protect your house from a flood, it’s still possible that flooding will cause severe damage to your home. If your home has been damaged by water’s wrath, the pros at Black Diamond Water Damage & Disaster Restoration are here to help.

We work tirelessly to address a wide range of issues, including flooding, fire damage, storm damage, mold treatment, sewage backup, and biohazard cleaning. With us, feel certain that our skilled professionals will help you restore your home or commercial space to the greatest standards.

Black Diamond Water Damage & Disaster Restoration will help you with all of your storm damage restoration needs. With over 20 years of catastrophe repair knowledge, we will accomplish it all fast and efficiently. Contact Black Diamond Restoration today to learn more!

Documenting Fire Damage for Insurance Claims: A Step-by-Step Guide

Navigating a fire’s aftermath can be overwhelming, especially when it comes to filing a fire damage insurance claim—we’re here to guide you through it.

Amidst the chaos of a house fire, one crucial aspect that demands immediate attention is documenting fire damage for insurance claims. Adequate documentation not only expedites the claims process but also ensures that policyholders receive fair compensation for their losses. Let’s delve into helpful tips and best practices for effectively documenting fire damage for insurance claims.

What is fire insurance?

Fire insurance covers the costs of repairs and losses caused by a house fire. It’s likely already covered under your home insurance policy, but if not, purchase it separately for peace of mind. Most lenders require proof of homeowner’s insurance in the amount to cover the sum of the loan. In any event, obtaining coverage is a smart way to safeguard your most valuable investment from fire.

Get to know your policy 

Fire Damage Insurance Claim

Understanding your fire insurance policy is crucial before disaster strikes. Study your policy document, paying close attention to details like coverage limits, deductibles, and what’s left out. Get to know what types of fire damage are covered, any tricky limitations, and how much you’re on the hook for with the deductible. Familiarity will only help you if you need to file a fire damage insurance claim.

Here are typical coverages to expect for fire insurance:

  • Personal property – Personal property insurance protects your damaged valuables. Some custom or valuable products, such as unique jewelry, fine art, and high-end gadgets, may require additional coverage.
  • Liability – If someone is hurt in a fire at your house, liability insurance will cover any legal or medical costs associated with the event. 
  • Total loss – If a fire renders your house uninhabitable, insurance will cover any additional expenditures incurred for temporary relocation.
  • Dwelling – Dwelling coverage is the portion of a homeowner’s insurance policy that covers the cost of repairing or rebuilding your house. Dwelling coverage also protects built-in appliances and house systems.

Understanding what your policy doesn’t cover is equally important as knowing what it will cover. For example, fire insurance typically won’t cover a fire you intentionally started. It will also not protect against flames caused by conflict, nuclear radiation, or pollution.

If a flood, earthquake, or other prohibited risk in your policy causes a fire, you’ll need additional coverage to recover your losses. Also, if you or your family members are wounded in a fire, homeowner’s insurance will not cover your medical expenditures. Knowing these limitations will better help you mentally and financially prepare for any potential disaster.

Safety first

Before you start documenting fire damage, practice safety first! Make sure the place is safe to enter, and you’ve got the green light from the fire department or the right authorities. Slip on protective gloves and a mask for good measure, keeping yourself guarded against any potential hazards like soot or weakened structures. It’s all about staying safe while assessing the damage.

Secure your property

After a fire, your property becomes susceptible to additional risks like weather damage, vandalism, or unauthorized entry. If it’s safe to enter, take swift action to secure the premises before  documenting fire damage. Board up any windows or doors left exposed by the fire and consider installing temporary fencing to deter trespassers.

If your house is unstable following a fire, restoration contractors will secure and stabilize it with board-up services and roof tarping. The purpose of this step is to preserve your house and prevent more damage as the insurance claim procedure progresses. Do not ask these providers to begin rebuilding or restoration until you file a fire damage insurance claim.

File the claim

If your home has been through a fire, big or small, processing an insurance claim ASAP is critical. Filing fire damage claims sooner means receiving your claims reimbursement faster, leaving less space for more harm to develop, and resuming normal life sooner rather than later.

When submitting a fire damage claim, your insurance company will want any documentation of the damaged house and belongings. They will also send out their own adjuster to assess the damage and determine how much and when your claim will be reimbursed. Your agent will walk you through this process to make sure everything is accounted for.

Take general photos of the damage

Fire damage claims always begin with thorough photo documentation. Take extensive photos of the whole property, as these overview photos offer perspective for the scale of the destruction. Capture photographs from various vantage points, both within and outside the premises. This will be used as a visual baseline to analyze the fire’s impact.

Note any structural damage

Next, take note of any structural damage caused by the fire. This includes collapsing ceilings, damaged walls, and weakened foundations. Pay particular attention to any structural components that could present a problem down the line, such as weakening support beams. Documenting structural damage is critical for both safety evaluations and proper claim evaluations.

Make a list of any destroyed items

As you make your fire damage claims, also draft a detailed list of damaged items. This inventory serves as crucial documentation for your insurance claim and helps you receive proper compensation for your losses. Be thorough in your list, including descriptions of each item, quantities, and their estimated value.

Taking photos or videos of the damage can also be helpful supplementary evidence. Having a comprehensive record of your damaged belongings will streamline the claims process and make it easier to assess the extent of your losses.

Meet the adjuster

When your insurance adjuster shows up to assess your property and belongings, it’s crucial to be there to welcome them. After all, you know your house inside and out, especially if you’ve recently experienced fire damage. Take the opportunity to walk them through the property, pointing out any damage they might overlook.

During your meeting with the adjuster, make sure to keep thorough documentation of everything you discuss. From policy limits to deductibles, and even questions about loss of use coverage, it’s essential to have a record of all conversations. Don’t forget to keep track of any papers you sign as well. This documentation will help support your claim and serve as legal protection in case of disputes.

Get multiple estimates

While the insurance company may suggest a vendor to provide you with a repair quote, it’s crucial to seek multiple estimates from reputable contractors of your choosing. Insurance companies often have established relationships with their preferred vendors. Seeking additional estimates not only offers peace of mind but also saves you time and money in the long run.

Be cautious of fraud

Be cautious as you may encounter numerous contractors, roofers, and other vendors reaching out to offer their services to property owners affected by the fire. Verify all necessary licenses and thoroughly check references before making any decisions. Also, note that restoration professionals are not licensed to handle insurance claims on behalf of policyholders.

Hire a fire restoration company

Once you’ve reached out to your insurance provider and discussed the next steps, they’ll guide you on when to engage with a fire damage restoration firm. These specialists are crucial for addressing urgent issues like water damage, securing the property, and ensuring proper ventilation. Additionally, they excel at guiding their clients through the recovery process.

Your chosen restoration team will collaborate closely with local fire department personnel to commence work promptly and safely. Upon arrival, an emergency response team will assess the extent of the damage and devise a comprehensive plan for fire repair services. Immediate steps, such as water removal to prevent further damage, are prioritized.

In addition, restoration companies will utilize specialized cleaning products and techniques to eradicate any lingering signs of smoke from your home. Smoke damage can persist even after the flames are extinguished, posing a significant threat to your property and belongings. Addressing this issue early on is among the primary tasks undertaken by your restoration team.

Fire Repair Services

Document the cleanup process

As part of the documentation process, document the cleanup and restoration operations. Take photos of dirt collection, damaged items, and the restoration process. This not only documents the rehabilitation process, but also serves as documentation of the efforts taken to prevent additional harm.

Ask for an advance on your claim

If the fire damage is severe enough that you must evacuate your house and seek temporary accommodation, it’s fair to request an advance on your claim. While this is not a guarantee, they may be willing to pay a portion of the claim upfront to alleviate the cost of these unforeseen expenses.

Black Diamond Restoration is here for you after a house fire

After you file a fire damage insurance claim, reach out to Black Diamond Water Damage and Disaster Restoration for the most effective house fire damage restoration services in Utah. Our commitment to providing excellent service has brought us to the forefront of the industry. We are situated in Murray, Utah, and proudly service Salt Lake City and the neighboring areas.

Black Diamond Restoration provides efficient, effective, and trustworthy fire damage regeneration services. Our experienced and trained personnel will guide you through the restoration procedures and restore your house to the highest standards. To learn more, contact Black Diamond Restoration today!

Utah Flood Restoration Experts: Choosing the Right Team for Your Needs

When confronted with water damage in your Utah home or business, opting for a reliable Utah flood restoration company is crucial for swift recovery.

Utah’s diverse climate, ranging from dry deserts to sporadic heavy rainfall, makes it susceptible to flooding. When floods strike, the damage can be severe, impacting homes, businesses, and communities. Finding seasoned flood restoration pros in such situations is critical.

With dozens of restoration options, choosing a flood restoration team proves daunting. In this article, we’ll provide you with the guidance necessary to choose a reliable restoration company, ensuring timely and effective repair for your property.

Evaluate expertise

One of the most crucial aspects to consider when choosing a flood restoration team is their collective experience and expertise. Experience matters, especially when dealing with the unique challenges posed by Utah’s climate and geography. Search for companies with a proven track record of handling a wide range of flood-related incidents.

An experienced company will have developed proven strategies for restoration that have stood the test of time. Delve into the specifics of their restoration techniques and whether they incorporate cutting-edge equipment. The use of advanced tools is pivotal in achieving effective restoration outcomes.

Equally crucial is verifying the team’s expertise in addressing the unique challenges posed by different property types. A competent team should demonstrate adaptability to handle both residential and commercial spaces. Verify that the team possesses the versatile skill set necessary for handling the intricacies of your particular property.

House runied by Flood

Confirm necessary licensing and guarantee

When choosing a flood restoration team, look for a company that is legally registered in the state where it operates. You should also seek a provider that is bonded and licensed. If any legal concerns develop, you will feel confident that your best interests will be kept safe. Make sure this information is clearly identified in the contract before signing on the dotted line.

As you check the company’s contract, also inquire about their guarantee. Not every organization will provide precise promises. For example, they cannot promise that mold won’t grow following a flood. Instead, search for a firm that avoids making unrealistic claims. Prioritize one that recognizes the value of craftsmanship. They will ensure you obtain high-quality services.

Look for advanced equipment and technology

Next, find out what equipment the water restoration team is using. Any flood restoration pro understands that basic equipment will not suffice. Premier firms will even use specialized technologies for document and content restoration, such as vacuum freeze-drying, gamma irradiation, and ultrasonic separation for damaged electronics, documents, fine art, machinery, and other media.

Proper moisture detection, extraction, drying, and dehumidifying equipment are required for a successful repair. When the right procedures and equipment are employed, the restoration process will speed up and you can address your water and moisture problem before it turns into a mold problem.

Personal property such as papers, artwork, pictures, and family treasures are also restored using advanced equipment. Knowing that these tools are part of a company’s water damage repair arsenal is a solid indication your property will be well taken care of.

Verify training and certification

One of the first steps in hiring a water damage restoration business is to check their qualifications and licenses. Confirm that the business has the appropriate certificates and licenses from local and state authorities. These certifications reflect that the business has met specified industry requirements and has the necessary knowledge to undertake water damage repair tasks.

Before hiring water damage repair services, also ensure that the crew is adequately certified. Are the technicians licensed? Are their documents up to date? Did they get training and certification? Look for firms that have received accreditation from the Institute of Inspection Cleaning and Restoration (IICRC). Choosing a business that keeps its personnel trained will give you peace of mind knowing you’re using knowledgeable experts.

Look into disaster response time

Did you know that mold begins developing in as little as 24 hours? Once it takes hold, it produces spores that grow exponentially. Because of this, it’s critical to act quickly when dealing with water damage.

It’s incredibly helpful to find a water restoration company that’s available around the clock. Inquire about the company’s average response time and emergency management procedures. You need a water restoration company that will react quickly and begin work right away when you’re in a crisis.  Create a contingency plan with a business that will be on standby in case of a water damage incident.

A reliable water damage repair business will arrive at any time with comprehensive situational knowledge — whether through a countrywide network of facilities near major metropolitan areas or pre-loaded trucks that reduce response times. There’s no time to waste when it comes to water damage. If you can’t receive rapid customer service on the phone or otherwise, it’s doubtful their response time will be any more efficient.

Insurance coverage and documentation

Make sure the Utah flood restoration business you hire has enough insurance coverage. This covers both general liability and workers’ compensation insurance. Insurance coverage safeguards you against any liability in the event of an accident or damage during the repair procedure.

Furthermore, respectable repair businesses will give enough documentation and thorough reports on the restoration process, such as images, moisture readings, and itemized listings of damaged objects. Clear documentation is essential for insurance claims and future references.

Top-of-the-line restoration companies will help you file a claim with your insurance. The best restoration firm will help you get the most out of your insurance by completely understanding the degree of your water damage and reporting the claim on time. They will also find solutions to complete the job if there are any complications.

Flood damage effects

Read customer reviews and testimonials

Take time to study customer reviews and testimonials for the flood restoration pros you’re considering. Online platforms and review websites provide essential information about previous clients’ experiences. Pay special attention to evaluations that emphasize the company’s professionalism, communication, job quality, and customer service.

If feasible, request recommendations from the business and contact prior clients for personal input on their experience with the company. Speaking with former clients will help you feel more confident in your decision.

As you chat with these consumers, inquire about their experience dealing with the water damage restoration firm. Did they have any problems? How were the concerns resolved? Was the team professional? Would they suggest this company to a friend? If not, continue searching until you find the right fit.

Transparency and communication

Working with a water damage restoration company requires clear communication and openness. Choose a firm that prioritizes open communication from the outset. The ideal company will provide you with a thorough pricing estimate and timetable for the repair process, so you know what to anticipate. 

An esteemed water restoration business will also provide a detailed explanation of their restoration strategies, answer any concerns you may have, and keep you updated throughout the process. A reputable organization will have sharp communication skills and prioritize customer satisfaction.

An agency that keeps you up to date on current industry practices is one you want on standby. A corporation that constantly reassures you that they are there for you will eventually be there when you need them. Keep these tidbits in mind as you search for the perfect business to hire.

Comprehensive plan for damage repairs

Next, learn about the company’s approaches and mitigation processes. Once you’ve narrowed down your choice of water damage restoration companies nearby, inquire about the business’s procedures. How will they restore your home? What tools do they use? How fast will they respond? Learning more about the company’s approach will help you understand what to expect if you need their assistance.

An active investigation of the company’s restoration procedures reveals insights into its methods. Services that are prepared to share their method display expertise and thoroughness. This transparency is critical for determining their capabilities and aligning expectations.

No two repair tasks are exactly the same. Your flood site is unique, so you should learn about the specific plan of attack that the pros have in mind. The company should have a precise plan for completing all repairs and preventing future issues such as mold growth.

Questions to ask a flood restoration company

Here are a few questions to keep top of mind as you search for a reputable flood restoration company:

How long have you been doing business?

Experience counts. A long tenure entails exposure to several restoration situations. Their extensive knowledge enables them to successfully address your individual circumstances.

What kind of experience do you have?

Every scenario is unique, but it doesn’t imply that others aren’t like yours. Find out whether the firm has handled a case like yours and what the outcome was. Some restoration firms specialize in single-family home/residential insurance work, while others specialize in the commercial or multifamily market. Some only conduct emergency services, while others are full-service organizations that provide both emergency response and rebuilding.

What are the phases in the restoration process?

You deserve to know what to expect when it comes to restoration procedures. This enables you to understand the step-by-step process, timelines, and potential outcomes, contributing to a more informed decision-making process.

What are the pricing and payment options?

Transparent pricing is critical. Arrange your budget by actively enquiring about rates and payment options. Reliable organizations provide transparent cost breakdowns and flexible payment options, promoting confidence and avoiding financial shocks.

Can you share references or past examples?

Seeking references or case studies provides insight into the service’s previous success and client experiences. These real-world examples from prior projects are crucial for determining their competence and understanding their approach to client satisfaction.

Call Black Diamond Restoration today

When it comes to Utah flood restoration, trust the professionals at Black Diamond Restoration to be your go-to source. With our years of experience, comprehensive range of services, and commitment to excellence, we are dedicated to helping communities rebuild and recover from the devastating effects of floods and other natural disasters.
Explore the support our experts offer throughout the entire restoration process. We assess damages, create customized plans, and efficiently execute the work, utilizing our expertise and resources to restore your property to its pre-disaster condition.
At Black Diamond Restoration, we grasp the urgency and intricacy of recovering from floods and natural disasters. Our 24/7 available team is prepared to swiftly and effectively respond, restoring normalcy to your life.

Don’t face the daunting task of flood restoration alone. Choose Black Diamond Restoration as your trusted partner in rebuilding after disaster strikes. Call us today at 801.383.0964 or visit our website to learn more about our services and how we can support you.

8 Ways to Prevent Kitchen Fires

The kitchen is the heart of the home, but kitchen fire prevention strategies are crucial as you cook meals and create memories with your loved ones.

Cooking offers a time to come together and forge lasting experiences; however, it’s also a task that poses significant fire risks. Cooking is the leading cause of home fires and home fire injuries in the United States. Taking preventative measures will drastically reduce the risk of a dangerous fire starting and spreading through your home.

Read on for eight fire safety kitchen tips that will help keep you and your loved ones safe as you create in the kitchen. These fire safety kitchen tips will give you the peace of mind you need.

1. Install smoke alarms and make sure they work.

Smoke detectors play a crucial role in early fire detection. They provide an essential early warning that helps make the difference between a manageable situation and a catastrophic event. Smoke detectors should be installed in all key areas of your home, especially the kitchen. Test your devices regularly and replace batteries as necessary to ensure they are always working.

Treat all smoke alarm warnings seriously. It’s easy to ignore if there’s only a puff of smoke, but these devices serve as a warning sign that there’s too much smoke in the house. If your alarm beeps while cooking, turn everything off immediately and open nearby windows and doors to let the smoke out.

Keep a fire extinguisher nearby and learn how to use it

2. Keep a fire extinguisher nearby, and learn how to use it.

The kitchen is the best place to store a fire extinguisher in your home. Having one within easy reach is a lifesaver because, when it comes to putting out fires, every second counts. Choose an extinguisher specialized for kitchen use, such as a Class K extinguisher — designed specifically for cooking oil and grease fires.

Purchasing a fire extinguisher is just the beginning — its life-saving potential remains untapped if you don’t know how to use it. Familiarize yourself with its operation and place it in a location accessible to all family members. Here are four steps, known as the P.A.S.S. technique, to operating a fire extinguisher:

PULL – Pull the pin to break the tamper seal.

AIM – Aim low and point the nozzle toward the base of the fire.

SQUEEZE – Squeeze the handle to release the extinguishing agent.

SWEEP – Sweep from side to side at the fire’s base until it extinguishes. If the fire re-ignites, repeat steps two to four.

3. Never leave food unattended.

One of the most vital kitchen fire safety rules is to never leave cooking food unattended. People are multi-taskers by nature, and it is often difficult to stay solely focused on the kitchen. The TV’s blaring, someone’s texting, you’re watching the kids, and during this, you’re trying to prepare dinner without burning it.

If you’re planning to cook, make sure you don’t also have five other tasks going on at the same time. This is often easier said than done but pay particular attention to food that is on the stove or in the oven. If you’re broiling, grilling, sautéing, or frying food, you’ll want to monitor it closely, prevent grease spills, and flip food over when necessary. A kitchen fire can ignite without warning.

4. Wear appropriate clothing.

Your clothing choices matter when it comes to kitchen fire prevention. While puffy sleeves are perfect for special occasions, it’s not the best idea to cook with them on. Roll up your sleeves or change into a different shirt without loose sleeves and excess fabric that easily catches fire. You should also remove jewelry before turning the heat on.

Similarly, loose clothing can snag on pots and pans, accidentally sending them tumbling to the ground. Temporarily removing these hazards is your best bet to prevent a catastrophe in the kitchen.

5. Be cautious with cooking oils.

Closely monitoring all cooking oil temperatures is another critical fire safety kitchen tip. Not all oils are equal, and that includes their smoking temperature. For example, safflower oil won’t smoke until it reaches 510 degrees, while avocado oil will smoke at 375 degrees. Always research the smoke point for the oil you’re using.

The flash point is another kitchen fire safety rule when working with cooking oils. This is when the oil is hot enough to burst into flames. The easiest way to keep an eye on temperatures while cooking is with a probe thermometer that clips onto the side of the pot. This will monitor the temperature throughout the whole cooking process to keep your food delicious and your family safe.

Turn off the oven and stove

6. Turn off the oven and stove.

It is all too easy to finish cooking but forget to turn off your oven or stove. Having your burner die out is not the only consequence of this oversight — a raging fire can also start. If flammable materials are nearby or the stove malfunctions, it might ignite and lead to a fire. Leaving a stove or oven on can also lead to gas leaks, another fire hazard.

One way to remember to turn off your oven or stove is to turn on your exhaust fan at the same time. If you need an extra reminder, write “Turn off oven/stove” on a sticky note, and tape it to your exhaust fan. Then, every time you turn the fan off to make your kitchen quiet again, you’ll remember to turn the heat off too.

7. Exercise caution with kids.

Distractions are a massive cause of kitchen fires. Because of this, another kitchen fire safety rule is to beware of kids while cooking and preparing food. Teaching your children to cook is formative and fun, but make sure any enthusiasm doesn’t get in the way of common sense. Kitchens are inherently dangerous and the consequences can be severe.

Here are some fire safety kitchen tips to keep top of mind as you share your love of cooking with your children:

  • Move appliance cords out of reach of children.
  • Designate a “kid-free zone” that is at least three feet away from the stove.
  • Teach them about what materials are/are not microwave-safe.
  • Keep flammable items well away from the stove.
  • Turn the pot and pan handles toward the back of the stove.
  • Store knives far away from the counter’s edge.
  • Roll up their sleeves and tie back long hair before cooking.
  • Teach them to wait until food is fully cooled before tasting.

8. Clean kitchen surfaces.

There are plenty of reasons to keep your kitchen spick and span, but you’ve probably never considered fire safety as one of them. Maintaining clean and clutter-free surfaces keeps the room less flammable. That fine layer of vaporized grease-coating countertops and cabinets encourages a fire to spread rapidly. Scrub all surfaces down daily to prevent this buildup.

Keeping your kitchen clutter-free will also reduce the risk of explosive fire hazards. Store your potholders and dish towels in designated spots well away from the stove/oven. Never store anything above, in, or on your oven and stovetop. Oils, vinegar, spices, or other recurring ingredients should be stored in a nearby cabinet, but not directly next to the stove.

Immediate steps to take after a house fire

Preparing for the aftermath of a house fire is another key component of kitchen fire prevention and safety. Here are some essential steps to take if you fall victim to a house fire:

  • Create an emergency exit plan and practice it with your family.
  • If you can’t put out a fire using an extinguisher within 10 seconds, evacuate the building.
  • Once everyone has exited safely, call 911 for emergency help.
  • Do not reenter the property until the fire department has deemed it safe.
  • Document any damage for insurance purposes.
  • Contact a restoration company to remediate quickly and safely.

Contact Black Diamond Restoration today.

House fires and smoke damage pose a serious threat to your home and health. As a newly minted kitchen fire prevention professional, you know that it’s best to leave fire restoration and cleanup to the professionals. The experts at Black Diamond Restoration are here to help!

Our specialized staff has decades of experience mitigating smoke and fire damage, along with water, mold, storm, and sewage damage. No matter the size of the problem, we’re here to help you restore your home and resume normal living. Contact Black Diamond Restoration at 801-797-2502 or reach out online to schedule your emergency service.

The Hidden Costs of Ignoring Water Damage in Your Home

Ignoring small leaks in your home might seem like a minor issue, but this will lead to hidden water damage costs that go beyond the visible problems.

From a leaky roof to burst pipes, water damage wreaks havoc on properties every day. Unfortunately, many people ignore the potential consequences of these seemingly minor inconveniences.

When it comes to the financial impact of water damage, the costs of avoiding it are far more severe than tackling the problem head-on. In this blog, we’ll discuss the hidden costs of ignoring water damage in your home and why it’s vital to resolve any issues as soon as possible.

Structural damage

The immediate and apparent damage caused by water is often the tip of the iceberg. Unresolved water damage is a huge threat to your home’s vital structural components. Water can seep into every inch of your home and compromise flooring, cause wood rot, weaken the foundation, destroy the ceiling, and lead to significant structural failures.

The financial impact of water damage is cumbersome when it comes to structural repairs — after all, replacing an entire ceiling or flooring system is not cheap. This is why it’s critical to address any water concerns before they affect every corner of your home and threaten your home’s safety.

Damage to personal belongings

Like a sticky toddler, water has a way of leaving its mark on everything it meets. It quickly wreaks havoc on your prized possessions without much of a warning. In particular, water and electronics don’t mix well. If flooding compromises your computers, tablets, phones, TVs, or video game systems, it’s incredibly difficult to salvage them.

Unwelcome water can also warp your furniture, stain your clothing, dissolve the ink on important papers or books, damage photo albums, and more. Items soaked in water, even for a short time, become completely unsalvageable. Some items are strictly irreplaceable, while others might be too expensive to replenish at all.

Environmental consequences

Water problems also have significant environmental consequences. Some of these hidden water damage costs might affect you directly, while others contribute to environmental crises at large. Water is a precious resource, and leaks are one of the top reasons for water wastage. This waste not only escalates your water bill but also puts a strain on the environment.

Leaks introduce harmful substances into the water supply. For instance, a leak in sewage pipes contaminates groundwater with pollutants and toxins, potentially affecting drinking water quality for both humans and wildlife.  Persistent leaks also lead to soil erosion, mold and mildew growth, habitat disruption, landfill contributions, and greenhouse gas emissions.

Legal ramifications for multi-unit owners

If you own a multi-unit building, it’s vital to know your legal responsibilities for water damage. Landlords need to keep their tenants’ living spaces safe and comfortable. If plumbing leaks happen because of neglect, like not fixing broken pipes, you could be held responsible for more than the water damage costs.

Financial drain

Ignoring small leaks in your home can initiate a financial drain that’s difficult to stop. Here are some of the potential financial impacts of water damage and putting off restoration:

  • Escalated water bills – Even a small leak wastes substantial water over time. Pay close attention to any changes in your water bill. Even a dripping faucet can cost up to hundreds of dollars annually.
  • Hefty home repair costs – Emergency plumbing expenses come with a hefty price tag. Water damage also often compromises electrical systems, leading to further expenses in rewiring and electrical repairs. The longer water damage is neglected, the more extensive and expensive the repairs become.
  • Decline in property value – If you try to sell your home with existing water problems, potential buyers might hesitate to commit. This results in a significant decline in the value of your property.
  • Increased insurance premiums – Insurance companies might see water damage as neglect from homeowners. This could mean higher premiums or even a flat-out “nope” for coverage in future water mishaps. Promptly address water damage, not only to mitigate current issues but also to maintain a favorable standing with your insurance provider.
Increased health hazards

Increased health hazards

Overlooking minor water problems isn’t only about the financial impacts of water damage — it also poses serious health risks. Plumbing leaks foster the growth of harmful bacteria and microorganisms, leading to various health issues like infections. These health concerns become serious and costly to treat if left unattended.

Mold and mildew growth

Mold and mildew thrive in damp environments, making water leaks and floods an ideal breeding ground. Over time, these harmful substances have the potential to cause health problems

Molds produce a range of allergens and irritants. Inhaling or touching mold can cause allergic reactions, asthma attacks, lethargy, and more. In 2004, the Institute of Medicine (IOM) found sufficient evidence to link indoor exposure to mold with upper respiratory tract symptoms,  such as coughing and wheezing, in otherwise healthy people. 

Eliminate standing water quickly to deter mold spores from moving in.

Boosted pest and insect populations

Unfortunately, water damage also creates the perfect breeding ground for pests and insects. Damp areas provide an optimal environment for termites, roaches, and other pests to thrive. The cost of pest control for these unwanted guests adds another layer to the hidden costs associated with water damage.

Mental toll

The impact of water damage extends beyond the physical aspects of a home; it often takes a toll on your mental well-being. Dealing with the aftermath of water damage is a stressful and emotionally draining experience. The peace of mind that comes with a water-damage-free home is priceless, emphasizing the importance of addressing any potential issues promptly.

Preventing water damage to your home

Prevention is the best strategy to avoid abhorrent water damage costs. Here are several precautions you should take to safeguard your property from water damage:

  • Routine inspection – Regularly inspecting your home for leaks, mold, and cracks is one of the best preventative measures to take. Check under sinks, around toilets, near your water tank, and anywhere else that uses water. 
  • Clean gutters and downspouts – Clean out your gutters and downspouts with the changing seasons to prevent blockage. Clearing these components will allow water to move through and prevent flooding to your roof and foundation.
  • Keep trees trimmed – Trim any trees that could interfere with your drainage system. Be sure to plant any new trees at least 20 feet away from pipes and drainage fields.
  • Maintain appliances – Most household appliances use water. Inspect them monthly for any cracks, leaks, or mold growth. Examine the hoses that lead to your fridge, washing machine, and other appliances to make sure water is flowing freely.
  • Invest in quality materials and waterproofing solutions – Install leak detectors or water alarms that will detect the presence of water in an area. Install these in any room to get alerts on potential water pooling.
  • Keep an eye on water pressure – If you notice any significant changes in water pressure, call in a professional to take inventory of your pipes. Water pressure changes could indicate pipe failure.
  • Know how to shut off your water main – The water main provides water to your whole house. Know where it is and how to shut it off to prevent flooding in case of an emergency.
  • Don’t delay repairs – If you notice any red flags, take immediate action. Your promptness makes all the difference on your property and wallet.

Black Diamond Water Damage and Disaster Restoration will help

If you spot leaks or any other water damage red flags in your home, don’t delay restoration! Black Diamond is here to promptly address the problem and help you avoid hidden water damage costs.

We provide water damage restoration and mold remediation services throughout Salt Lake City, Utah, as well as the surrounding cities of West Valley, Sandy, Murray, and more. We also offer fire, sewage, and other emergency restoration services 24 hours a day, seven days a week. Contact Black Diamond Restoration whenever calamity strikes!