9 Signs You’ll Need to Hire a Mold Remediation Team

Since mold is a potentially serious financial issue and a dangerous health risk, you can’t afford to delay mold remediation, no matter the size of the problem.

Mold tends to develop in dark, damp locations that are typically out of sight, making it difficult to locate and eradicate. People often don’t realize something is wrong until the signs are evident and cumbersome. Whether you’re dealing with a serious situation or a hidden case of mold, hire a mold remediation service to get the job done right.

If your house or business requires mold remediation right away, here’s what you can expect when dealing with this problem in the great state of Utah.

What Is Mold?

Mold is an organism that grows both indoors and outdoors and is a member of the fungus family. Mold is a vital aspect of the ecosystem when it appears in nature. The fungus family aids in the decomposition of dead, organic plants and animal debris. Indoor mold development, on the other hand, is undesirable since it can be hazardous, producing allergies or harmful infections.

There are several types of mold and they all need moisture to grow.  Mold growth occurs on wood, carpet, insulation, paper, and food.

What’s the Difference Between Mildew and Mold?

According to the EPA, mildew refers to a type of mold or fungus.  Mildew is a generic term used for mold growth that has a flat growth tendency. Mildew thrives on shower walls, windowsills, and other areas with high moisture levels.

Molds are microscopic fungi that grow in the shape of multicellular filaments known as hyphae.  Molds are able to grow on any organic substance, including fabric, leather, and paper, as well as the ceilings, walls, and floors of homes with moisture issues. Molds come in many varieties and often emit a strong, musty stench in poorly ventilated areas, such as basements.

How Do You Identify Mold

How Do You Identify Mold?

Now that we know what mold is, let’s talk about how to find it in your home. Here are seven ways to identify a mold issue:

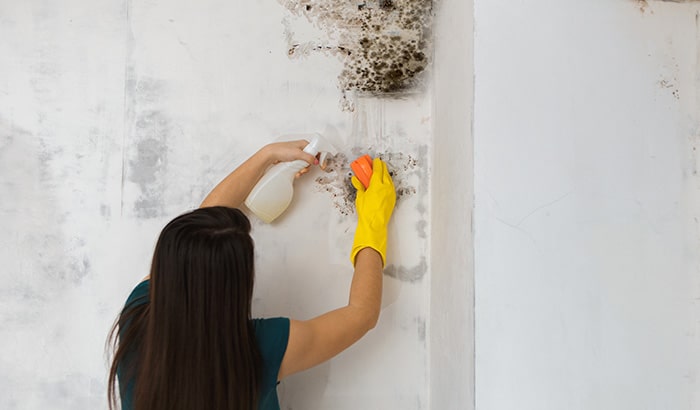
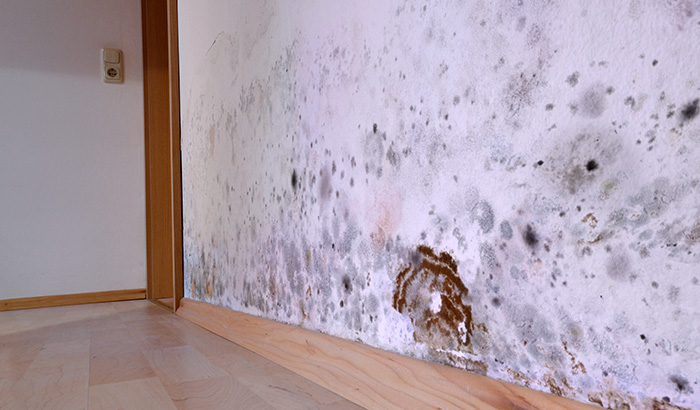
  1. Discoloration – Mold is most commonly visible as grey, black, green, or bluish spots in grout lines, on walls, or other surfaces. Keep an eye out for any pink, red, or brown streaks. Mold can have a powdery, fuzzy, or slimy texture. It’s commonly indicated by dark water stains on walls, floors, or ceilings.
  2. Odor – Even if there are no visible mold symptoms, any musty, earthy, or sour odor suggests that mold is hiding. If you don’t see mold but notice a smell, call in an expert to check hidden colonies of mold in walls, crawl spaces, or along home foundations.
  3. Check damp areas – If surfaces in the home feel damp—walls, flooring, furniture, cabinetry—the humidity level might be too high. Mold growth is encouraged by high humidity levels in both visible and non-visible areas such as inside couch cushions, mattresses, or walls. Add a dehumidifier or operate your HVAC system more regularly to help minimize humidity. Any mold development should be cleaned up or removed promptly.
  4. Check your plumbing – A modest, gradual leak might supply enough moisture to trigger mold development. Check all plumbing connections inside and outside the house regularly, repair leaks as soon as possible, and make efforts to get rid of mold.
  5. Bubbling paint – Sometimes bubbling or peeling paint is simply a sign that you didn’t properly prepare your home before painting, that you didn’t use the best painting techniques, or that your property has an extremely old paint job; however, this could also indicate moisture intrusion. Bubbling can occur on both the real baseboard and the wall when mold is at play.
  6. Heath symptoms – Inhaling mold spores can lead to serious health problems, especially in people who already have preexisting health conditions. Once in your lungs, the spores can aggravate asthma symptoms and cause respiratory infections. This can cause intense coughing and sneezing as well as shortness of breath. The worst-case scenario is when the fungus grows in your lungs, causing additional symptoms such as chest pain, fever, and blood coughing. If this occurs, get medical assistance immediately and have your home evaluated for mold.
  7. Health symptoms in your pet – Unusual pet behavior or sickness might also indicate mold exposure. Mold affects pets in the same way that it affects humans. Dogs, for example, are more inclined to nose around in moldy regions or to eat mold by accident. Pets can be far more sensitive to indoor mold than humans because of differences in their body sizes and immune systems. This might include tiredness, hard breathing, coughing, wheezing, vomiting, and a loss of appetite. Mold allergies can cause frequent itchy, swollen and irritated skin, and hair loss in some pets.
  8. Squishy floors – Moisture problems in your subfloor can make some portions of your floor squishy, and mold might already be forming. If you cannot easily access your subfloor, you might need to lift some of your flooring to check for mold growth. If the mold growth is not widespread, we recommend hiring a professional to ensure thorough mold infestation elimination.
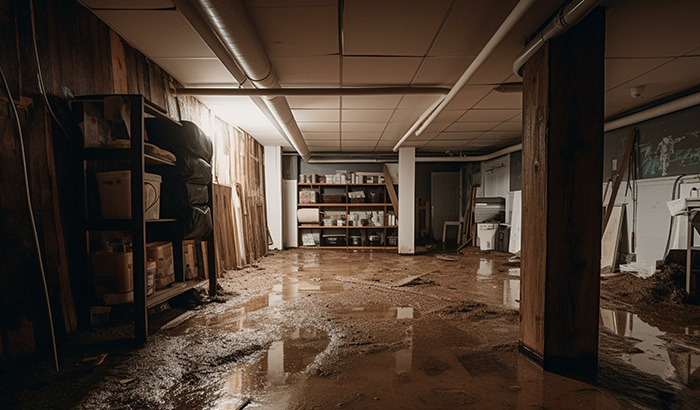
  9. Past flooding – If your home has previously flooded, there is a good risk that mold is already developing in your space. Although mold may not form immediately following floods, it can grow over time and lead to serious infestations. As a result, you should look for mold in previously flooded locations.
      What Does Mold Remediation Do

      What Does Mold Remediation Do?

      Mold remediation services are critical to establishing long-term solutions to a frequent problem seen in many homes and businesses. The best mold remediation businesses use a multi-step method that keeps fungus at its normal levels, while also putting a plan in place to prevent future mold outbreaks.

      While the task of a mold remediation firm may appear simple, the top organizations have elaborate protocols in place to treat the problem, protect the area from further growth, and work with qualified partners to remove any toxic substances from the property appropriately. Here are some common steps that mold remediation service teams take:

      • Inspection – The first step is to properly inspect the property to determine the degree and nature of the mold problem. Moisture meters, thermal imaging, and other tools may be used to identify hidden mold behind walls, ceilings, or under floors.
      • Samples – In certain cases, the team may collect mold samples to evaluate the type and level of contamination. This information is used to create an appropriate remediation plan.
      • Containment – To prevent mold spores from spreading to unaffected regions, the team will implement containment procedures. To inhibit spore dispersal, this may entail sealing off the affected area using plastic sheeting and using negative air pressure equipment.
      • Proper gear – To guarantee their safety while dealing with mold, team members will wear proper personal protection equipment such as respirators, gloves, and suits.
      • Removal and disposal – The mold will next be physically removed from the damaged surfaces by the cleanup crew. Scrubbing, sanding, or utilizing specialized cleaning solutions may be necessary to eliminate mold colonies. Moldy materials and detritus are carefully bagged and disposed of per local standards. This aids in the prevention of cross-contamination.
      • Drying – Following mold removal, the team will address underlying moisture concerns by drying impacted areas and installing dehumidification methods. This procedure is critical for preventing mold growth in the future.
      • Post-cleaning inspection – Following the completion of the remediation, the team will conduct a final inspection to ensure that all mold has been successfully eradicated and the affected area is safe for human occupancy.
      • Prevention – The experts will provide recommendations to avoid future mold problems. This could involve enhancing ventilation, correcting water leaks or moisture issues, and providing advice on how to keep indoor humidity levels stable.
      • Verification – Some mold remediation programs may include post-remediation testing to ensure that all mold has been removed. This testing verifies that the property is fit for habitation.

      Mold removal is a specialized subject that involves expert knowledge, training, and the use of appropriate equipment and techniques to ensure safe and effective mold eradication. Hiring a trained mold remediation firm is critical for properly resolving mold concerns and preventing their recurrence.

      Call Black Diamond Restoration for Utah Mold Remediation Today

      Black Diamond Restoration is a market leader in Utah mold remediation. You can rely on our mold removal firm to complete the work correctly. We provide complete, professional services to both homeowners and companies. We use cutting-edge technology, and our highly experienced personnel are dedicated to providing you with exceptional customer service.

      Black Diamond Restoration is a market leader in mold cleanup. We take pleasure in being quick, efficient, and dependable in all we do. Please contact us if you notice or suspect mold growth in your house. 

      To learn more, call us at 801.316.8997 or visit our website now! We are based in Murray, Utah, and we service the Salt Lake and Utah Valley areas. Work with Black Diamond Restoration to restore your property today!

      Emergency Storm Damage Restoration: Here’s What to Expect

      Severe storms and natural disasters can wreak havoc on homes and communities, leaving a trail of storm damage and destruction in their wake.

      From powerful tornados to severe thunderstorms, the aftermath of natural disasters requires immediate attention. Your longing for normalcy can become hindered over and over again as you navigate this stressful time. Emergency storm damage repair and restoration is a critical process that will help mitigate further damage and help get your life back on track.

      Today, we’re covering what to expect when faced with the aftermath of a storm and the steps involved in the restoration process. This information will help you have all your ducks in a row if you’re ever faced with an unexpected accident.

      The Impact of Storm Damage

      Storms come in various shapes and sizes and, as such, leave an array of destruction behind. Before we dive into the restoration process, here are several ways a storm might devastate your property so you know what to expect:

      • Roof Damage: High winds or intense weather can peel off shingles, cause dents and cracks, and compromise the roof’s overall structure. When you experience storm damage on a roof, a roofing or storm damage restoration company can help repair it to working order again.
      • Flood Damage: Flooding occurs when there is an overflow of water onto normally dry land. Floods are typically caused by heavy rainfall, snowmelt, dam failure, or tsunamis. Proper flood restoration and cleanup entail several steps to ensure no mold, structural issues, or other problems prevail.  
      • Tree Damage: Falling trees or wayward branches are a common reason for storm damage on a roof. Falling trees can damage the structural integrity of your home, wreck your roof, disrupt electrical systems, or even break windows. Tree damage can pose serious safety risks and should be dealt with promptly.
      • Structural Damage: The force of a storm can weaken the structural integrity of buildings, leading to extensive repairs or an overall collapse. Common signs of home structural damage include cracked walls, leaning chimneys, unaligned doors, cracked or sloping floors, and dampness in the basement. If you observe any of these signs, act quickly and seek professional assistance for emergency storm damage repair.
      • Electrical Damage: Electrical systems are often the victim of a vicious storm. If lightning strikes your home, a surge of electricity will pass through. If this happens, it’s possible to short your electrical system and cause permanent damage. Downed power lines, electrical shorts, and power outages can pose a risk of electrical fires.
      • Mold and Mildew: Lingering moisture from storms can cause unwanted mold and mildew to sprout. Heavy rainstorms, hail, and flooding can all leave behind a trail of mold that can be harmful and frustrating to deal with. A restoration company can assist you in mold remediation so that you can enjoy your property again without fear of illness.

      Steps in the Restoration Process

      1. Initial Assessment and Planning: The first step when handling emergency storm damage repair is to assess the extent of the damage. Call in the professionals who will check for storm damage on a roof, structural damage, electrical hazards, and other safety concerns. They’ll address any immediate threats first and discuss the plan to tackle all other issues with you.
      2. Securing the Area: After the initial assessment, restoration professionals will secure the affected area to prevent further damage and keep everyone safe. This might involve temporary fencing, warning signs, or other barriers to restrict access to potentially dangerous areas.
      3. Water Extraction: If your property has suffered from flooding, extracting the water and drying the area is the next priority. Powerful pumps and dehumidifiers will remove the standing water and excess moisture from the affected area. This will help prevent further damage and allow the crew to mitigate other issues.
      4. Debris Removal: Removing debris and hazardous materials is an essential step in the storm damage repair process. After a storm, there’s usually a significant amount of debris, such as fallen trees, loose branches, broken glass, and down power lines. All this must be removed for the restoration team to work efficiently and safely.
      5. Structural Repairs and Reconstruction: This step involves reconstructing any compromised foundation or load-bearing walls. It might also include repairing roofs, electrical systems, plumbing, roads, bridges, or other essential structural components.
      6. Cleaning and Sanitation: After the structural repairs are complete, thorough cleaning and sanitization will prep the affected areas and make them livable again. This includes mold remediation, disinfecting all surfaces, and addressing environmental concerns.
      7. Restoring Utilities and Essential Services: Your restoration crew will also focus on restoring utilities and other essential services like electricity, water, sewage, and more.
      8. Content Restoration: Any personal belongings that were damaged by the disaster are assessed, cleaned, repaired, or replaced.
      9. Preventative Measures: After the restoration work is complete, measures are taken to help prevent future storm damage, such as reinforcing the structure.
      10. Final Inspection: A thorough final inspection is carried out to ensure that all restoration work has been completed and is safe to inhabit again.
      11. Documentation and Insurance Claims: Your restoration team will help you navigate insurance claims throughout this process and work with your provider to facilitate a smooth claims process.

      Selecting a Professional

      Finding the right fit for your storm damage restoration needs doesn’t need to be complicated. Consider the following points when searching for the right company to handle the storm’s aftermath.

      • Insurance Relations: Does the restoration company have experience working with insurance companies? You’ll want to choose a company that knows how insurance payments work and what is expected of them when working with home insurance companies. The insurance world is confusing, and your restoration company should be equipped to navigate it properly.
      • Experience: Storm restoration is a complex process that warrants proper expertise. Some restoration might require mold remediation, fire damage restoration, or chemical spill clean-up. The restoration company needs to know how to handle a variety of circumstances and prove its expertise.
      • Certifications: Only select a restoration company that has the proper credentials. Licensing requirements vary by location, so check with local and state authorities to ensure the company complies with all necessary regulations.
      • Emergency Response: Disaster can strike at any time of day, and it doesn’t always wait for regular business hours — choose a restoration company that can be reached 24/7 and offers emergency response services.
      • Transparency: Your restoration company of choice should be transparent with their services, pricing, and the way they do business. Ask for a detailed estimate of the costs involved in the restoration and see what they’re willing to include. They should openly discuss the cost of labor, materials, equipment, and any additional charges that might apply.
      • Local Knowledge: It’s beneficial for a restoration company to be very familiar with local building codes, laws, weather patterns, and the most common types of storm damage in your area. That way, they will be better equipped to handle your specific restoration needs.

      Insurance and Storm Damage

      Insurance plays a vital role in storm damage restoration. This process can be costly, and you deserve the peace of mind that insurance has your back. Here are some key points to consider when navigating the insurance world:

      • Understanding Your Policy: Thoroughly read your policy to understand what is and isn’t covered. Meet with your insurance agent if you have any questions.
      • Prompt Reporting: When disaster strikes, report it to your insurance company as soon as possible. Delayed reporting can lead to complications in the claims process and delays in restoration.
      • Documenting the Damage: Take as many photos and videos of the damage as is safe to do so. This documentation is invaluable during the claims process, as it provides evidence of the extent of the damage.
      • Communicate With Your Adjuster: Your insurance adjuster will assess the damage and determine the value of your claim. Keep that line of communication open and provide any documentation they request.
      • Compare Estimates: Compare the estimate from your restoration company with the estimate provided by the adjuster. They should be consistent in addressing the same damages.

      Call Black Diamond Water Damage and Disaster Restoration for Prompt Recovery

      When disaster strikes, you need restoration services that can handle all your storm damage needs. Trust the experts at Black Diamond Restoration to be your go-to source. 

      With our comprehensive range of services and commitment to excellence, we are dedicated to helping communities rebuild and recover from the devastating effects of natural disasters. Our licensed and certified professionals will help you through the restoration process, restoring your home or commercial space to exacting standards.

      Black Diamond Water Damage and Disaster Restoration is ready to serve all your restoration needs — 24/7. We’re based in Murray, Utah, and proudly serve Salt Lake City and the surrounding areas. With over twenty years of Disaster Restoration experience, we do it all, and we do it right! Contact us today to learn more about our services.

      9 Common Utah Disaster Restoration Services You May Need

      Utah is prone to natural and man-made disasters, leaving behind a trail of destruction that requires the help of Utah disaster restoration services.

      Utah’s diverse landscapes and rapidly changing weather are equally stunning as they are hazardous. The Beehive State faces its fair share of potential calamities, from wildfires and earthquakes to floods and mold infestations. When these unfortunate events occur, disaster recovery companies are crucial for a speedy and efficient cleanup. Today’s blog explores eight common Utah disaster restoration services you’ll need when disaster strikes.

      1.  Water and Flood Restoration

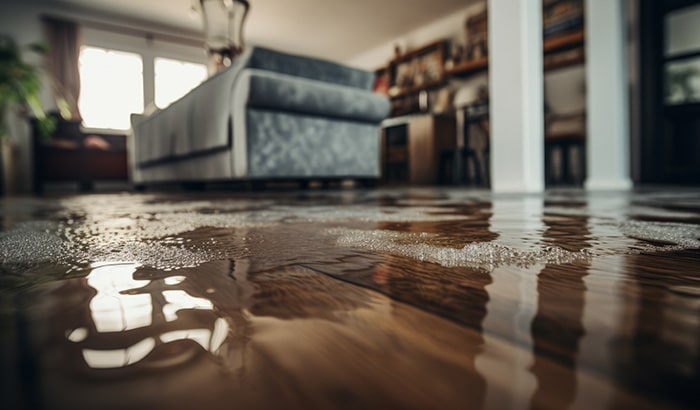
      Utah’s dry climate doesn’t make the state immune to water damage. Heavy rains, flash floods, burst pipes, and leaking roofs all lead to spontaneous flooding. Flood restoration professionals are equipped to remove the water, dry the affected areas, and treat the area to prevent future mold or structural damage. Here is a quick rundown of what to expect when a flood restoration expert arrives at your home:

      • First, they will inspect the area wearing protective gear.
      • Next, they will extract any standing water from the property.
      • Once the water is removed, a thorough inspection is conducted to assess the extent of the structural damage caused by the flood. They will evaluate the foundation’s condition, walls, floors, and ceilings.
      • After inspection, the expert will dry the affected area to prevent mold growth. If mold has already reared its ugly head, your flood expert will employ specialized techniques to remove the mold and prevent its recurrence.
      • Finally, disaster recovery companies will provide detailed documentation for insurance purposes. You’ll receive photographs and documents to help with the insurance claim process.

      2.  Mold Remediation

      Utah’s fluctuating temperatures create the ideal environment for mold growth, especially when coupled with water damage aftermath. Mold remediation services are essential to remove mold and prevent its return. Mold growth may cause health problems and damage property if not addressed promptly and correctly. Here’s what a mold remediation specialist will do to eradicate the problem:

      • Inspection – A mold removal expert will survey the affected areas and identify the type of mold present.
      • Containment – They will seal off the affected areas to prevent mold from spreading to other areas.
      • Removal – Next, they will remove any contaminated materials and decontaminate all non-porous surfaces. Scrubbing, sanding, and suppression techniques are used to remove the growth.
      • Restoration – Drywall, insulation, and other previously removed materials are restored to their pre-mold conditions.
      • Testing – Post-remediation testing ensures the mold problem has been effectively addressed.

      3.  Smoke Damage Restoration

      Although they’re cut from the same cloth, smoke and fire damage differ. Smoke damage is produced by a fire’s smoke but not by the fire itself. Smoke leaves behind a layer of soot and a stench that is challenging to eradicate. It also has a greasy-like consistency that makes it difficult to remove. There are several types of smoke damage that disaster recovery companies assist with, including:

      • Wet smoke damage – Low-temperature fires produce wet smoke. This is the most difficult to remove since it is thick and sticky.
      • Dry smoke damage – Dry smoke leaves behind a powdery soot that is a bit easier to clean and wipes away neatly.
      • Protein smoke damage – Protein smoke refers to the fumes from burning high-protein foods. Meat, poultry, fish, and eggs are the biggest culprits. This smoke leaves behind a yellow-brown, greasy residue that is best removed by professionals.

      4.  Fire Damage Restoration

      Fires are one of the most devastating forces of nature a home or business can experience. Whether it is smoke damage, structural damage, or a combination of both, you want a professional to handle the repairs.

      Fire damage is the result of the burning or melting of objects due to excessive heat. Fire disaster restoration covers the damage caused by the flames and intense fire heat. This might include reconstructing structural materials or replacing badly damaged property and valuables. It might also include electrical and plumbing repairs if necessary. Fire damage and water damage often occur concurrently.

      5.  Storm Damage Restoration

      An unexpected weather event can wreak serious havoc on your home. Windstorms, flooding, hail, blizzards, tornadoes, and thunderstorms are some of the wide range of weather phenomena you might experience in Utah. These storms often lead to roof damage, broken windows, structural issues, and more. Storm damage restoration services are critical to repair and rebuild affected properties.

      When Mother Nature threatens your home, prompt restoration is essential. Storm disaster restoration services will clean up any water, mud, or debris left behind by the storm and repair structural damage.

      6.  Earthquake Damage Restoration

      Utah is earthquake country — The Intermountain Seismic Belt runs through the state, making it susceptible to earthquakes. Seismic activity often triggers a succession of potential hazards, including ground shaking, rockfalls, surface fault rupture, fires, gas leaks, landslides, liquefaction, and more. Disaster restoration companies assist with any or all these issues to restore your property to normalcy.

      7.  Biohazard Cleanup

      Biohazard contamination can be very dangerous, so when it comes to biohazard cleanup, you want a professional to step in. Biohazard cleanup services are needed to remove contaminants safely and thoroughly, preventing health risks.

      Some examples of biohazards include anthrax, HIV, Ebola, botulism, tuberculosis, cholera, salmonella, and yellow fever.

      A licensed technician will clean, sanitize, and deodorize the site where the event occurred. Biohazard cleanup is a service that requires industry experience, specialized equipment, and appropriate certifications.

      8.  Sewage Cleanup

      Sewage Damages are unexpected, hazardous, and difficult to properly clean and repair. Sewage cleanup professionals are equipped to remove waste, disinfect affected areas, and mitigate the risks associated with sewage contamination. They also wear appropriate personal protective equipment (PPE) like gloves, masks, goggles, and waterproof clothing to prevent exposure to hazardous materials.

      Here are a few kinds of sewage damage you should know about:

      • Clogged or backed-up sewage lines
      • Burst pipes
      • Overflowing toilets
      • Sump pump failure
      • Sewage backup from municipal lines
      • Human error, such as flushing inappropriate items, pouring grease down the drain, etc.
      • Natural disasters

      9.  Asbestos Abatement

      Asbestos was used in many buildings in Utah before its health risks were fully understood. When these affected materials are disturbed, the resulting fibers pose severe health hazards. Asbestos abatement services are crucial for safely removing these materials in compliance with regulations.

      Here’s what you should expect when you hire asbestos abatement services:

      • Assessment and inspection – An initial assessment is conducted to determine the presence of asbestos-containing materials within a building. Samples are collected and sent to a certified testing laboratory.
      • Containment and isolation – Isolating the area helps to prevent the release of asbestos fibers to other parts of the building.
      • Wetting – Before any material is disturbed, it must be thoroughly wetted to prevent the release of airborne fibers.
      • Removal – Careful removal happens through a combination of techniques, including manual removal, hand tools, and mechanical methods.
      • Decontamination and disposal – The area is thoroughly decontaminated after removal, and all asbestos waste is sealed and transported to a hazardous waste disposal facility.
      • Cleanup and clearance testing – A thorough cleanup and clearance testing is performed to ensure the area meets safety standards.

      Importance of Disaster Restoration Services

      Whether it’s a sudden wildfire in the dry summer months or a heavy winter snowstorm causing structural damage, the need for disaster restoration services in Utah cannot be overstated. Here are a few reasons why you should outsource these services instead of attempting restoration on your own:

      • Rapid response – Disaster restoration professionals are equipped to respond speedily to emergencies.
      • Safety and health – Disaster restoration experts ensure your property is safe for habitation after a devastating event.
      • Professional expertise – Professionals have the knowledge, experience, and equipment necessary to address disaster-related issues effectively.
      • Regulatory compliance – Reputable restoration businesses are well-versed in regulatory compliance and ensure all work is done per applicable laws and regulations.
      • Peace of mind – Dealing with the aftermath of a disaster can be overwhelming — knowing you have trained experts on the case provides peace of mind during a difficult time.

      Contact Black Diamond Restoration Today

      Of all the Utah disaster restoration companies, you can trust the experts at Black Diamond Restoration to be your go-to source. With our years of experience, comprehensive range of services, and commitment to excellence, we are dedicated to helping communities rebuild and recover from the devastating effects of natural disasters.

      Discover how our skilled professionals assist you through every stage of the restoration process. From assessing damages and developing customized plans to executing the work efficiently and safely, we have the expertise and resources to restore your property to its pre-disaster condition. Our team is available 24/7 to respond quickly and effectively to restore normalcy in your life.

      Trust Black Diamond Restoration to handle the restoration process efficiently, carefully, and precisely. Contact Black Diamond Restoration today and let us restore your property to its safe and habitable state after a disaster.

      Here’s 10 Biohazard Signs to Look Out For

      Regardless of their profession, everyone should study biohazard signs and safety precautions to protect themselves from potential risks.

      Many professionals, including healthcare specialists, waste management personnel, animal handlers, and laboratory technicians, undergo extensive training in handling biohazards. They regularly encounter bloodborne pathogens, hazardous waste, or other infectious materials, so they must receive suitable guidance to handle these situations properly; however, professionals aren’t the only ones who come in contact with biohazards.

      The general public should also educate themselves about biohazard signs, clean-up, and safety precautions. You never know when your child might get sick in the middle of the night and miss the toilet or when sewage damage takes over your basement, so it’s best to be prepared for anything.

      Stay tuned as we discuss 10 signs of biohazards so you can handle these situations like a pro.

      What Are Biohazards

      What Are Biohazards?

      The Occupational Safety and Health Administration (OSHA) defines biohazards, or biological hazards, as any substance that threatens the health of living organisms, particularly humans. Biohazards can exist in the form of toxins, microorganisms, or other biological agents that can cause harm. Some common examples of biohazards include human bodily fluids, medical waste, animal carcasses and droppings, mold and fungi, and viruses and bacteria.

      Biohazards are categorized by the CDC according to their risk and the extent of the harm they cause:

      • Biosafety Level 1 (BSL-1): Level one encompasses low-risk biohazards that are unlikely to threaten healthy organisms. Non-pathogenic strains of bacteria or viruses are examples of level-one biohazards. An example of a BSL-1 microbe is a nonpathogenic strain of E. coli.
      • Biosafety Level 2 (BSL-2): BSL-2 agents build upon BSL-1 and so forth. Biohazards categorized as level two have a moderate level of risk. These agents can cause mild to moderate diseases in humans and animals.
      • Biosafety Level 3 (BSL-3): Level three biohazards are capable of causing serious diseases. An example of a BSL-3 microbe is Mycobacterium tuberculosis, the bacteria that causes tuberculosis.
      • Biosafety Level 4 (BSL-4): These biohazards are the most dangerous and are often fatal. They frequently include deadly pathogens for which there are no known treatments or vaccines.

      Biohazard Signs

      1. Biohazard Symbols

      Perhaps the most straightforward way to identify a biohazard is through the biohazard symbol itself. This universally recognized symbol consists of a trefoil, circular shape in the center with three interlocking lobes surrounding it. The color is typically red or red-orange because that striking color is often associated with “warning” or “danger.”

      This international symbol was developed in 1966 by Charles L. Baldwin of Dow Chemicals and Robert S. Runkle of the NIH. They were asked to create a highly recognizable design that was:

      • Striking in form
      • Unique and unambiguous
      • Quickly recognizable
      • Symmetrical
      • Acceptable to all groups of varying backgrounds

      The winning symbol is the same one used today and has stood the test of time for being both unique and memorable.

      You might encounter a biohazard symbol in any setting where materials pose potential risks to health or the environment. This includes healthcare facilities, waste management, laboratories, pharmaceutical companies, industrial settings, radiology and nuclear facilities, emergency response and biohazard clean-up, first aid kits, personal protective equipment (PPE), and more.

      2. Sharps Container

      If you’ve ever received a vaccine or worked in a medical facility, you’re probably familiar with a sharps container. This red-orange container is used to house used needles, syringes, or other sharp objects that could be contaminated. The container is labeled with a biohazard symbol as well as the word “SHARPS” on an orange background to remind workers to dispose of sharp objects safely. If you notice this bin in a public setting, exercise serious caution and avoid contact with it.

      3. Warning Signs

      Areas containing a biohazard are often tagged with a direct sign. It should be made extremely clear that there has been a biohazard in that area by using caution tape and signs labeled “Biohazard Area,” “Caution: Biohazard,” or “Danger: Biological Hazard.” Always take these warning signs seriously and flee the area.

      4. Emergency Broadcast

      In the event of a public biohazard exposure, local healthcare workers will report a pattern of illness or a sudden wave of people seeking emergency medical attention. You might be alerted by an emergency radio or TV broadcast, a phone call, or a home visit from a member of your local health department or an emergency response professional.

      Environmental and Biohazard Clean up Crews

      5. Environmental and Biohazard Clean up Crews

      Professional teams involved in cleaning up hazardous waste or spills wear PPE donned with a biohazard symbol. All workers cleaning up contaminated sites should receive detailed training to minimize the risks associated with exposure. Some bullet points from this extensive training include:

      • OSHA and regulatory compliance, including local, state, and federal regulations governing biohazard cleaning
      • Biohazard awareness training to learn about different types of biohazards
      • The proper use and maintenance of PPE
      • Proper biohazard cleaning procedures and decontamination processes
      • Correct waste handling and disposal
      • Safe practices for handling bloodborne pathogens and the risks associated
      • Respiratory protection when dealing with airborne agents
      • The safe handling, storage, and disposal of hazardous chemicals
      • Methods to minimize contamination of soil, water, and air during biohazard clean-up processes
      • How to respond to biohazard-related emergencies
      • Proper forensic cleaning techniques
      • Hands-on training in practical settings that simulate real-world biohazard clean-up scenarios
      • Necessary documentation and reporting
      • How to communicate effectively with distressed or affected people

      6. Biological Containment Area

      Biological containment areas are designated spaces in laboratories or research facilities for handling highly infectious organisms. These areas are permanently flagged with signs of the same name. Unauthorized access to these areas could result in severe illness or death, so they should always be avoided. Professionals receive extensive training to work safely in these designated spaces.

      7. Spill Kits

      Spill kits are specialized containers designed to manage accidental spills of hazardous materials. These kits typically include absorbent materials, protective gear, spill containment devices, chemical neutralizers, a shovel and/or broom, additional containers or bags, hazardous materials labels, an emergency response plan, safety data sheets, and an instruction manual or guide. You might have seen one of these kits while grocery shopping or during a hospital visit, but you might also find them at construction sites, warehouses, schools, airplanes, or other public places prone to potential accidents or spills.

      8. Decontamination Stations

      The presence of decontamination stations such as emergency showers or eye wash sinks signifies the potential for biohazard exposure. In many industrial settings, these stations are installed for quickly rinsing off hazardous chemicals that come in contact with the skin or eyes. Signs for these stations will be posted above or near them for adequate visibility. Becoming familiar with the location of decontamination stations can promptly prevent severe chemical injuries.

      9. Unusual Odors

      Strong odors can potentially indicate the presence of a biohazard in the area. Nearly everyone can pinpoint the exact moment they drive past a skunk, but how can you tell if a pungent smell is actually dangerous? Here’s how unusual odors can potentially suggest a biohazard:

      • Exceptionally foul or putrid odors
      • Chemical odors that cause eye irritation or respiratory symptoms
      • Sickly odors like that of bacteria or fungi
      • Ammonia-like odors
      • Mold or musty odors
      • Decomposition odors
      • Fish or rotten egg odors

      10. Emergency Response Vehicles

      The presence of certain emergency response vehicles is a quick way to indicate a potential biohazard emergency. If you notice hazmat trucks or specialized medical units in a particular area, take this as a sign of a biohazardous incident. Ambulances, fire trucks, decontamination units, radiation response vehicles, or mobile laboratories might also be present. Seek immediate medical attention if you have fallen victim to a biohazardous incident; otherwise, flee the area.

      What To Do During a Possible Biohazard Exposure

      What To Do During a Possible Biohazard Exposure

      • Pay attention to official news sources to stay up to date on exposure information.
      • Learn where to seek medical attention if you become ill
      • Quickly flee any area if you notice suspicious matter
      • Cover your mouth and nose with a mask or other fabric that can filter the air but still allow you to breathe
      • Wash yourself thoroughly with soap and put on clean clothes
      • Don’t share food or eating utensils
      • Avoid crowds
      • Follow the instructions given by your doctor

      Black Diamond Water Damage & Disaster Restoration Can Help

      Now that you know the biohazard signs to look out for, reach out to Black Diamond Water Damage & Disaster Restoration in the event of a biohazard emergency. Based out of Murray, Utah, we proudly serve Salt Lake City and surrounding areas. Our licensed and certified professionals are no strangers to proper biohazard cleaning and will help you through the restoration process. We’ll make sure the area is cleaned effectively and safely so it can be enjoyed again.

      If biohazard cleanup is at the forefront of your mind, contact us through our site or call us at (801) 316-8997. We’ll restore your place back to its pre-damaged condition in no time. With over twenty years of Disaster Restoration experience, we do it all, and we do it right!

      What’s the Difference Between Smoke and Fire Damage?

      Even though smoke and fire damage go hand in hand, there are key disparities that create challenges for property owners recovering after a blaze.

      You’ve probably heard the phrase, “Where there’s smoke, there’s fire.” This phrase accurately explains the commotion of a fire, other than the flames’ immediate urgency. While each is destructive in its own way, you must understand their differences to determine the best cleanup approach.

      Smoke Damage vs. Fire Damage

      Smoke and fire damage are often used interchangeably, but each comes with distinct characteristics. Smoke damage is physical harm produced by a fire’s smoke but not by the fire itself. The leftovers of the fuel that once powered a fire generate smoke damage.

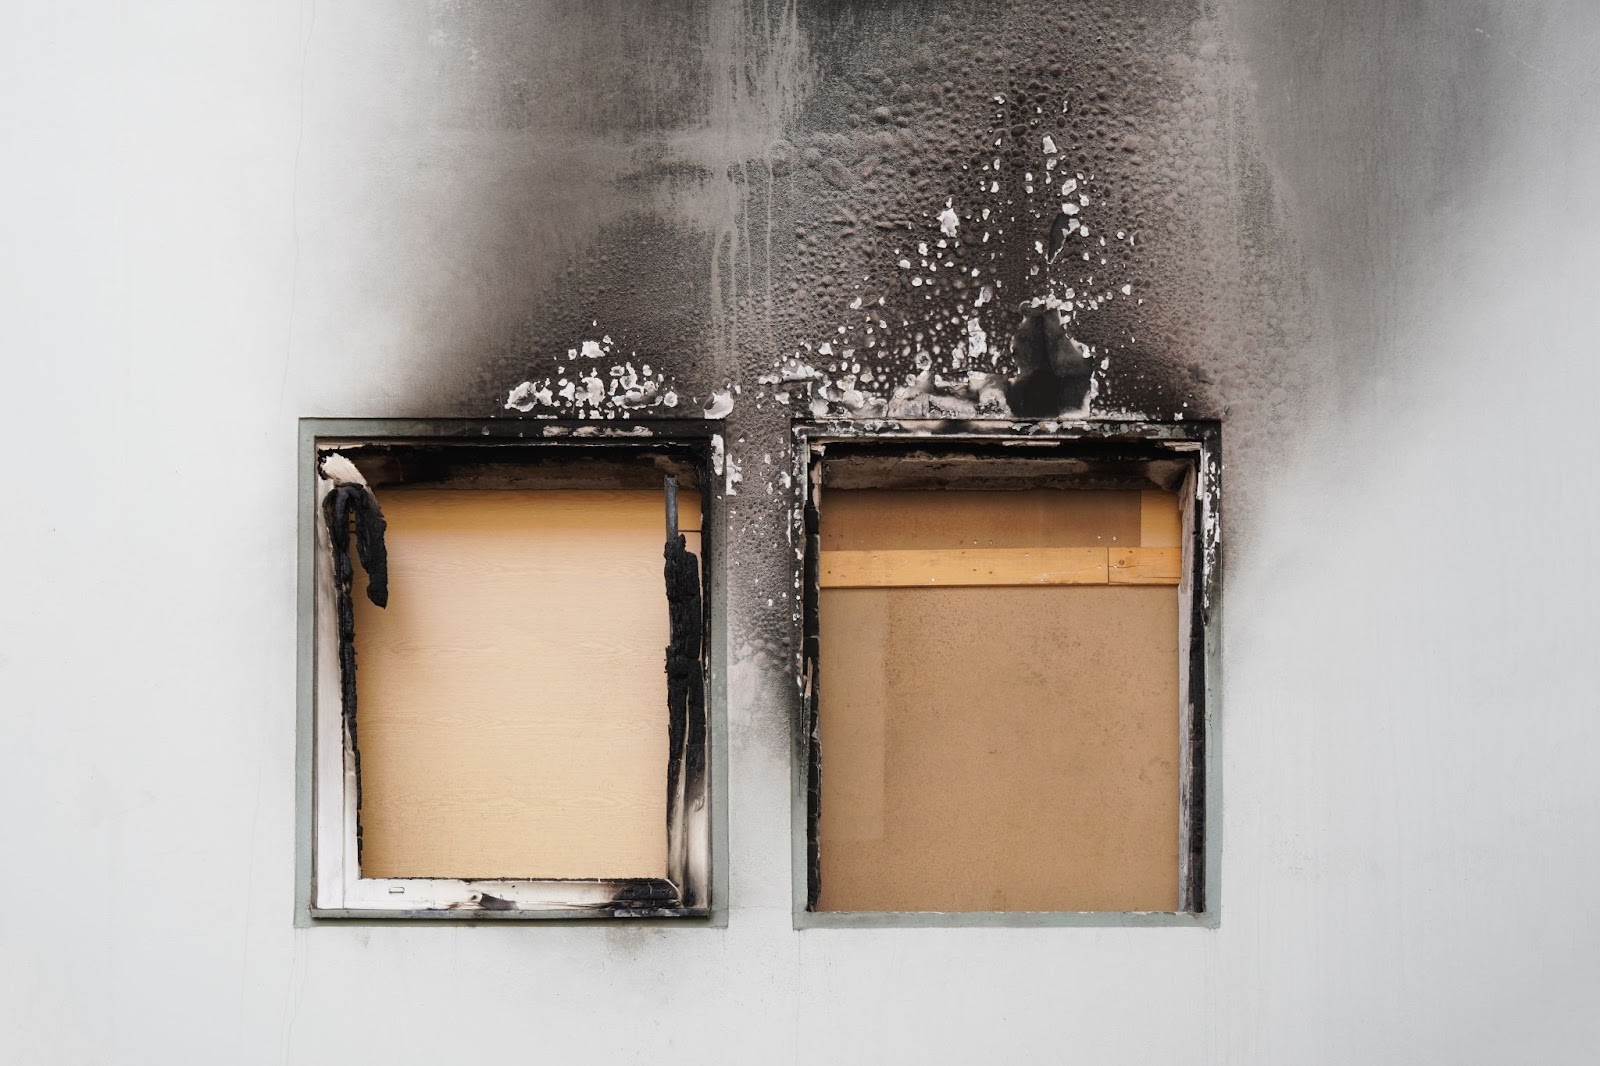
      Unlike fire, smoke does not destroy anything but leaves behind a layer of soot and a bad stench that’s difficult to remove. Smoke has a greasy-like quality that makes it taxing to eradicate and restore.

      Fire damage refers to the burning or melting of objects due to excessive heat. Damage can occur due to the flames directly or other corrosive substances emitted by the fire.

      Fire and Heat Damage

      Fires can sweep through an area in no time at all. The severity of fire damage is mainly determined by the strength of the fire that produced it. For example, if the fire was started by a short circuit or a gas leak, it might spread quickly, resulting in significant losses.

      No matter what causes a fire, the consequences are often disastrous. This includes physical damage to structures and items caused by direct flame and intense heat exposure. It can cause walls, ceilings, and roofs to collapse, as well as the destruction of furniture and personal items.

      Fire damage can take the form of many different shapes and sizes. The subsequent damage is the consequence of a combination of smoke, heat, and soot, which can cause various problems that need to be professionally addressed.

      Heat damage can affect anyone in the fire’s path. No matter how large the fire is, it can burn you. A wide range of outcomes can accompany heat damage, but burns are the most common. 

      Burns are classified based on severity from mild to life-threatening. If you have experienced any type of burn, be sure to seek immediate medical attention.

      Types of Smoke Damage

      Like fire damage, smoke damage also manifests itself in unpredictable shapes and sizes. Smoke damage primarily affects surfaces and can cause staining, discoloration, and corrosion of materials. It can also cause odors to permeate walls, ceilings, and objects. There are several types of smoke damage, including:

      • Wet smoke damage – A slow-burning, low-temperature fire produces wet smoke. It is often the most difficult type to remove since it is sticky and thick, adhering to all surfaces and objects. Wet smoke also has a significant stench, making cleanup a more time-consuming and complicated operation.
      • Dry smoke damage – A powdery dry soot is left behind by dry smoke. It burns at a high temperature because of the presence of paper and wood. It’s easier to clean and usually wipes away neatly. It is, however, a fine soot that can easily slip into cracks and crevices, hidden from view. Because the odor is disguised, it may persist even after washing.
      • Protein smoke damage – Meat, beans, and any other protein present in meals are examples of protein damage. It often leaves a yellow-brown residue that resembles grease. It can be tough to clean because of the stubborn grease. Professional cleaners can handle this the best since they use chemicals specifically developed for protein-based residue.

      No matter the type of smoke damage, it’s important to have it professionally cleaned. Professionals will ensure the smoke damage is addressed safely and effectively so you can enjoy your home again.

      Common Causes of House Fires

      Prevention is the best method to avoid any smoke and fire damage. By understanding the leading causes of house fires, you can be aware of the potential hazards around your home. Here are some common causes of house fires to watch out for:

      • Cooking Cooking fires account for nearly half of all recorded residential fires. Cooking is also the most common cause of home fire injuries and the second most common cause of home fire deaths. 
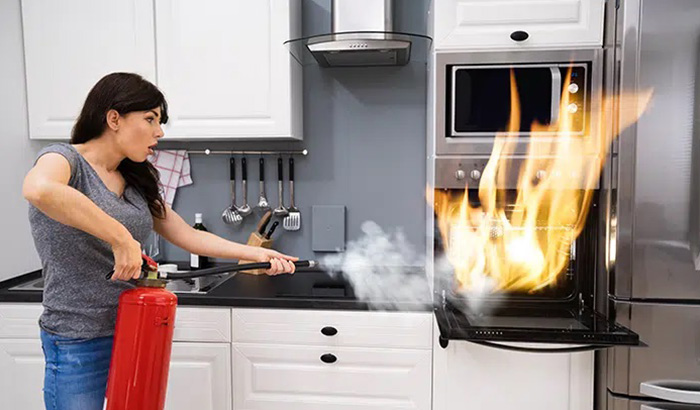
        While kitchen fires are the most prevalent cause of home fires, they are usually only serious when caused by grease fires. When your frying oil reaches temperatures above 375 degrees Fahrenheit, it will begin to smoke and then burst into flames. If you notice wisps of smoke, you must act quickly to prevent the fire from starting.
      • Electrical – You probably don’t think about your home’s wiring often, but faulty wiring can spark an immediate house fire. There are some common symptoms that your house’s wiring isn’t operating properly.
        Pay attention if the lights fade when you use another device, if you can only use one appliance at a time, and if you have regularly blown fuses. Investing in smoke alarms, fire extinguishers, and carbon monoxide alarms as your first line of defense against house fires will help protect your home and family.
      • Smoking – Besides the obvious health risks of smoking, it’s also a leading cause of house fires.  Incorrect cigarette disposal and cigarette smoke damage are profound areas of concern. Designate smoking areas far enough away from any combustible material and provide clearly marked receptacles for extinguishing cigarettes. These are two simple ways to avoid costly cigarette smoke damage restoration.

      Health Implications

      Where there’s smoke, there’s always soot. Soot is a greasy or powder-like substance mostly composed of carbon and produced from burns. Unfortunately, this material poses several health risks in your home, including the ones listed below:

      • Lung problems – Lingering particles from a fire can enter and irritate the lungs, causing various issues.
      • Skin problems – A smoke-damaged home can create skin problems like itching and rashes.
      • Poisoning from carbon monoxide – Gases emitted by soot and smoke particles can induce dizziness, headaches, and poisoning. Prolonged soot exposure may even increase the risk of certain cancers.

      Smoke and Fire Restoration

      Smoke and fire damage can harm your home; luckily, restoration is made easy with professional hands. Let’s take a deeper look at the different steps of restoration with each type of damage:

      1. Assessing the Damage

      • Fire damage – Fire damage restoration primarily covers the damage caused by the flames and strong heat of a fire. This involves restoring or reconstructing structural materials damaged or destroyed by the fire, such as walls, ceilings, and floors. It also involves fixing or replacing burned or badly damaged property and valuables.
      • Smoke damage – Smoke damage restoration involves the cleanup and renewal of secondary smoke and soot damage. This includes cleaning or restoring goods coated with smoke residues, removing soot residues from surfaces, deodorizing damaged areas to eliminate smoky aromas, and cleaning or restoring coated items. 

      2. Methods

      • Fire damage – Methods for fire damage restoration can be quite extensive. Depending on how much damage the fire caused. structural engineers and contractors may be called in to inspect and restore the building’s integrity. It may also include electrical and plumbing repairs if the fire has damaged these systems.
      • Smoke damage – Methods for damage restoration involve using specific cleaning techniques and tools to remove soot and smoke residue. Professionals use cleaning chemicals, abrasives, and even ultrasonic cleaning devices to eradicate the sights and smells. Air filtration procedures are also used to get rid of persisting smoke scents.

      3. Timeline

      • The timeline for fire damage restoration depends on the level of damage that occurred. Depending on the degree of the damage, the restoration procedures might include rebuilding and construction work, which can take weeks or even months.
      • The timeline for smoke damage restoration is often quicker than fire damage. Unlike fire damage restoration, smoke damage restoration can usually begin right away. Cleaning and deodorization procedures can begin once the property is safe to enter.

      4. Hire Professionals

      • General contractors, structural engineers, and electricians who specialize in repairing fire-damaged structures are frequently involved in fire damage restoration. Permits and inspections may also be required to ensure compliance with building codes.
      • Professionals with cleaning and cleanup experience, such as fire restoration companies, frequently handle smoke damage restoration. They have the tools and skills to remove soot and smoke residues from surfaces and belongings safely and effectively.

      Returning Safely Home After a Fire

      Returning home after a fire can feel scary and uncertain. Once firefighters have deemed the area safe to return, exercise caution until professional restoration services can arrive. Then, take the following steps:

      • Always follow the advice of the fire department and restoration specialists.
      • Try to steer clear of the affected areas. If you must sort through any debris, wear sturdy shoes, a mask, and protective gear — hazardous conditions and chemicals could be present. 
      • Anything that has come in contact with ash should be cleaned and sanitized.
      • Refrain from turning on propane tanks if you inspect any visual damage.
      • Don’t eat, drink, or breathe in anything that has been near the flames, smoke, or soot.

      Following these tips will keep you and your family safe. 

      Black Diamond Water Damage and Disaster Restoration Can Help

      With a goal of providing excellent service, Black Diamond Water Damage and Disaster Restoration provides the best smoke and fire damage restoration services for you and your home.

      Smoke damage removal from Black Diamond Restoration is efficient, effective, and dependable. To learn more, please reach out today via our website or by calling 801-383-0964.

      Utah Mold Remediation: Here’s What to Expect

      If you’re home or business needs Utah mold remediation fast, here’s what you can expect when tackling this issue in the Beehive State.

      Utah’s stunning landscape and seasonal climate make it a desirable place to live, but its status as one of the driest states in the country doesn’t make it immune to mold and mildew issues. Mold thrives in damp or poorly ventilated areas, which can occur anywhere worldwide. 

      If you’re currently facing a mold problem in your Utah home, stay tuned for everything you need about mold removal and remediation.

      What Is Mold?

      Mold is part of the fungi family and is an organism that can grow indoors or outdoors. Mold is a crucial part of the ecosystem when it exists outside in nature. The fungi family helps break down dead, organic plant and animal matter. On the other hand, indoor mold growth is unwelcome because it can be a hazard, causing allergies or infection.

      Mold Categories

      While there are over 100,000 different species of mold, the more common indoor molds you might encounter can be classified into three categories: allergenic, pathogenic, and toxic.

      • A mold removal company can remove allergenic molds, but they can often be eradicated using HEPA filters or home disinfectant.
      • Pathogenic molds are more problematic and often warrant a professional. Home disinfectants can control small amounts.
      • Toxic molds are the most hazardous and require a professional to kill and remediate the area.

      Identifying Mold in Your Home

      There are several red flags to anticipate when searching for mold in your home. Here are some common places mold tends to grow and how to identify the problem:

      1.  Visual– Look for discoloration, staining, or fuzzy patches on surfaces like walls, ceilings, and floors. Also, look out for any puddles of standing water or leaky pipes.

      2. Smell– Mold usually emits a musty, earthy odor. A persistent, unpleasant smell could point to a mold issue.

      3. Test kits– Home mold test kits are on the market and can help identify the amount of mold in the air or on surfaces. However, they don’t always produce accurate results, so we recommend professional testing.

      4. Check typical mold hotspots– Check areas where moisture is more likely to accumulate, like the bathroom, laundry room, crawl spaces, basement, kitchens, attics, and around windows and doors.

      5. Health issues– If you or anyone else in your home suddenly suffers from allergies, respiratory issues, or another unexplained ailment, mold could be the source of the problem.

      Hiring a Utah Mold Remediation Professional

      Everyone’s first instinct when they find mold is to remove it immediately, but hold your horses for just a moment because mold removal is best left to the professionals. Since mold remediation is a specialized process, expertise is required to remove the problem safely.
      Here’s what to expect when working with a Utah mold remediation professional:

      1. Inspection

      The first step for a mold removal specialist is a thorough inspection of the issue. Professionals will survey the affected areas and identify the type of mold present. They will also determine the extent of the contamination and tailor a plan to move forward.

      1. Containment

      Containment is the next crucial step in mold remediation. Any reputable mold removal company will seal off the affected area to prevent mold spores spread to other areas. Containment usually happens by applying a plastic sheet to create a negative air pressure environment. This will help ensure you don’t end up with an even more significant concern on your hands.

      1. Mold Removal

      Now that the area is safely contained, it’s time for the actual mold removal process to begin. This involves carefully removing any contaminated materials, such as drywall, insulation, carpeting, and any other porous materials that cannot be effectively decontaminated.

      Next, experts will clean and decontaminate all non-porous surfaces. A thorough scrubbing and sanding might be necessary to remove stubborn mold growth.

      Finally, professionals will use dust suppression techniques to minimize the spread and release of mold spores. Once the area has been thoroughly cleaned, sanitized, dried, and dehumidified, it can be restored and tested.

      1. Restoration

      Now that your space has been ripped apart, it’s time to rebuild the area. The restoration process involves restoring your home to its pre-mold condition. Drywall, insulation, and any other previously removed materials will be replaced. These new materials will help restore your home to its mold-free state.

      1. Testing

      Post-remediation testing is critical to ensure that the mold problem has been effectively addressed. Professionals use a few techniques to determine the presence of mold in a home.

      • Visual inspection- Visible signs of a mold problem include broken pipes/sinks/etc., spots with a history of leaks or flooding, and any areas with musty odors. This visual inspection should be straightforward after removal has taken place.
      • Mold sampling- Once the mold is removed, it’s taken to a lab to determine the type of mold and its toxicity level. Air sampling is the most common approach professionals take. The amount of mold spores found indoors is compared to the air outside.
      • Clearance testing- This final testing phase determines the removal efforts’ success. If all is well, it assures the area is safe to occupy again.

      Insurance Coverage for Mold Remediation

      Mold remediation coverage is not guaranteed through homeowner’s insurance. In cases of a burst pipe, your insurance might cover all or part of the damages. Each policy is different, so read it thoroughly to understand what is and isn’t covered. Take note that insurance will not cover mold removal services if the mold is the result of failure to maintain your property.

      Tips for Mold Prevention in Utah

      Here are several tips you can use in your resolve to keep a mold-free living space:

      • Inspect your appliances- All your water-using appliances carry a potential risk for mold growth. The warm water and moist circumstances are prime real estate for mold to blossom. Mold growing inside of appliances is a fairly common problem that’s pretty straightforward to address. A dash of bleach mixed with warm water is often all that’s needed to kill the growth. Scrub the area down with a bristle brush or coarse cleaning rag; you’re good to go!
      • Check out all water sources- Just like your appliances, any area that accumulates water is a potential breeding ground for pesky mold growth. Sink, bathtubs, showers, and toilets are often victims of this. Be sure to clean these areas weekly to prevent mold growth in your kitchen and bathrooms.
        And don’t forget the floors! Floor mats that soak up bathtubs and shower water can house mold without warning. Toss them in the washer weekly to keep them free from mold issues.
      • Throw out old food- Everyone is familiar with the look and smell of moldy food. Since mold primarily breaks down organic material, food is usually the first to go. Mold can grow in the pantry, refrigerator, or out on the countertop, so check and rotate items frequently. It’s a good rule of thumb to wipe down your pantry and fridge shelves weekly to prevent mold growth from spills.
      • Swap out your air filters- Air filters should be changed roughly every month. These porous filters help keep your house free from dust and pollutants, but they can get nasty fast if you’re not careful. Moldy ventilation isn’t a huge problem in Utah, but it’s still something to flag as a homeowner. As mold grows in vents, it can release toxic spores into many areas of your home.
      • Scan for leaks- As you know by now, water is mold’s best friend. Regularly examine your property for any pipe leaks and standing water. Mold growth tends to accelerate once the walls or floors are affected.
      • Examine your windows- Window tracks are another place mold tends to sneak up on. A quick scrub with a bristle brush and cleaning solution can help keep your window tracks sparkling.

      Call Black Diamond Restoration for Utah Mold Remediation Today

      Black Diamond Restoration is a leader in the Utah mold remediation industry. You can trust our mold removal company to get the job done right. We offer comprehensive, professional services to homeowners and businesses alike. We use state-of-the-art equipment, and our trained technicians are committed to providing you with excellent customer service.

      Black Diamond Restoration is a leader in the mold remediation industry. We pride ourselves on being fast, effective, and reliable in everything we do. Don’t hesitate to contact us if you’ve spotted or suspect mold growing in your home.Contact us at 801.316.8997, or visit our website to learn more today! We’re located in Murray, Utah, and serve the surrounding areas of Salt Lake and Utah Valley. Let Black Diamond Restoration restore your home today.

      How Can I Avoid Water Damage? 7 Things You Can Do

      Water damage can be devastating and costly to repair, especially because preventing damage is not always at the forefront of a homeowner’s mind.

      Water damage claims are among the most common types of insurance claims submitted for homeowners and renters. It’s a concern all year, but the good news is that there are precautions you can take to safeguard your property from water damage.

      Discover the best strategies to avoid water damage before it causes major harm to your home and property. Continue reading to learn more.

      Indoor Water Damage

      Water damage can seriously affect your home, and that damage can be expensive. You’ll be seeing dollar signs, but not in the way you want. Plus, water damage cleanup is a headache to deal with.

      Conducting frequent inspections around your home can help stop the problem before it escalates, but how do you know where to check? Here are four main spots to inspect for water damage inside your home:

      1. The kitchen – The kitchen is a high-risk area for water damage in the home, and refrigerators are one of the most common offenders. They leak for a variety of reasons, including clogged defrost drains or water supply lines, as well as ice maker failures.
        Dishwashers can also leak as a result of a malfunctioning door lock, a rusted tub, or loose or damaged valves. A water leak sensor strategically installed beneath the kitchen sink, refrigerator, or dishwasher, as well as regular cleaning and maintenance, will help you stay on top of any leaks and prevent costly water damage.
      1. The basement – Basements are a popular location for water damage. Water damage will occur in up to 98% of basements in the United States during their lifetime. This is because of seepage, which can occur from natural groundwater or even during a severe downpour. A home’s hot water heater is often housed in the basement, and it can leak if there is too much pressure within the water heater tank or if the pressure relief valve or drain valve is loose or damaged. Make it a routine to check for leaks around your water heater at least once a month. Low water pressure and rusty water are further indicators that your hot water heater requires professional servicing.
      1. The bathrooms – Another place that can suffer extensive water damage is the bathroom.  There are several issues with toilets, sinks, showers, and baths. Furthermore, high humidity on a frequent basis might lead to mold and mildew growth. Check for symptoms of leaks, such as discoloration on the walls or floors, on a regular basis to safeguard your bathrooms from water damage.
        After taking a shower or bath, place bathmats on the floor and always check around them for water. Turn on the fan to reduce humidity during and after the shower. De-clog your sink and shower drain on a regular basis. In addition, have a professional replace old fixtures and tiles that could lead to water damage.
      1. The laundry – When it comes to laundry room water damage, there are numerous potential causes. Just like everywhere else, inspect your washer on a regular basis. Washing clothes consumes a substantial amount of water; washing machines may overflow during operation, or a hose could burst. If this happens when you’re not at home to catch it, you could face major and costly damage.

      With so many possibilities for water damage, it can almost seem unavoidable. However, with the proper preparations, you can avoid water damage and the emotional and financial toll that it entails.

      Outdoor Water Damage

      Water damage doesn’t only affect the inside of your home — there are many areas outside your home that can be hotspots for water damage, too. Here are three more spots to check to avoid water damage cleanup outdoors.

      1. Gutters – Rain gutters are a crucial component of your home’s roofing system. They direct rain and runoff away from your property and its foundation. Water damage down the external walls of your home can be caused by missing, cracked, broken, or clogged gutters, and large volumes of water cascading over your gutters can damage the foundation and/or leak into your crawlspace. We recommend inspecting and maintaining your gutters regularly to avoid these issues.
      1. Water hose – A garden hose is a significant source of outdoor water damage. Extensive destruction can occur if your hose is leaking or running slowly. Water can cause problems as it slowly soaks through your home’s foundation or lower components. Because these are typically hidden from view, it is easy to underestimate the severity of the condition until it’s much too late. Wood decay, mold, soil erosion, and concrete cracks are all highly expensive to repair if not treated quickly. Don’t dismiss symptoms of water damage produced by a running hose if you encounter them near your property.
      1. Roof – Making sure that your roof is up to date and properly maintained is key to avoiding water damage.  First, thoroughly inspect the shingles a few times each year. Each season brings difficulties that are specific to the weather patterns prevalent at the time.

      Examine the shingles for signs of extreme wear or deterioration, noting any that are completely missing and must be replaced. Regularly remove leaves and debris from your roof and gutters. Roof debris cleaning successfully protects your home from harm and even prevents the growth of moss, lichen, and algae.

      Steps to Water Damage Restoration

      Now that you understand how to prevent and check for water damage inside and outside of your home, here are the typical steps for water damage restoration:

      • Assess the damage – To establish the extent and severity of the water damage, a skilled repair team conducts a thorough assessment. They locate the source of the water incursion, evaluate the damaged areas, and classify the water damage based on cleanliness and contamination levels. This assessment aids in the development of a detailed restoration plan as well as the estimation of the scope of repairs required.
      • Water removal – Effective water damage cleanup is essential to avoid further damage and mold growth. To remove standing water, restoration contractors employ powerful water extraction equipment such as submersible pumps, wet vacuums, and truck-mounted extraction systems. They also use moisture detection instruments to find hidden pockets of water and remove them completely.
      • Drying – After removing the excess water, the affected area must be completely dried to prevent mold growth and further damage. To extract moisture from walls, floors, and other structural parts, restoration professionals employ a combination of dehumidifiers, industrial-strength air movers, and specialized drying processes. Moisture levels are monitored on a regular basis to guarantee appropriate drying and to prevent secondary damage.
      • Mold remediation – Mold remediation solutions are used by restoration businesses to safely remove and restore mold-infested areas. Containing the affected area, filtering the air to remove spores, disposing of mold-contaminated goods, and administering antimicrobial treatments to prevent recurrence are all part of the process.
      • Deodorization and sanitization – Water damage can cause unpleasant odors and contaminants. To deodorize and disinfect the afflicted area, restoration professionals will clean the area, use an air purifier, and neutralize smells with deodorization.
      • Repairs – Once the area is dry and clean, restoration teams begin structural repairs. Repairing damaged walls, floors, ceilings, and other structural components may be included. If plumbing troubles are the source of the water damage, plumbing repair services might be necessary.
      • Electrical system – Water damage can cause electrical hazards and concerns, demanding a full review of the electrical system. Electrical components and wiring are inspected by restoration professionals to identify potential risks or damage. They execute essential repairs or cooperate with certified electricians to ensure the safety and functionality of the electrical system.
      • Communication – Reputable restoration businesses have open lines of communication with their consumers throughout the repair process. They offer regular updates on the restoration’s progress, resolve any issues or queries, and ensure transparency throughout the process. Restoration contractors also advise homeowners or property owners on necessary safeguards and post-restoration upkeep to ensure the integrity of the repaired property.

      Remember that depending on the severity of the damage and the type of water involved, the timetable for water damage restoration may vary. Time is of the essence, and it’s critical to act quickly to limit the degree of damage and avoid subsequent issues such as mold growth.

      Black Diamond Water Damage and Disaster Restoration Is Here for You

      Even if you’ve done everything possible to avoid water damage, accidents do happen. That is why Black Diamond Water Damage & Disaster Restoration is available to assist you. Call us right away since prompt treatment is critical to repairing your property and preventing future damage.

      We provide water damage restoration and mold remediation services throughout Salt Lake City, Utah, as well as the surrounding cities of West Valley, Sandy, Murray, and more. We also offer fire, sewage, and other emergency restoration services 24 hours a day, seven days a week, so give us a call whenever calamity hits!

      Here’s What Happens When You Don’t Get Rid of Mold In Your Home

      Mold remediation is crucial when it comes to mold in your home or business; simply ignoring it won’t make it go away. It’s important to realize that ignoring the problem won’t solve it — instead, it leads to many issues that will worsen if you don’t do something about it.

      Prevent mold from becoming a problem in your home by addressing it promptly. If you don’t, here’s what happens when you don’t get rid of mold in your home: 

      • Health Risks: Ignoring mold growth can lead to various health problems, especially for individuals with allergies, asthma, or weakened immune systems. The spores released by mold cause respiratory issues, persistent coughing, sneezing, and sinus congestion. In some cases, it might even trigger more severe reactions like fungal infections.
      • Structural Damage: Mold doesn’t just affect your health; it also damages the very structure of your home. As it feeds on organic materials like wood, drywall, and insulation, it weakens these materials, potentially leading to structural instability over time.
      • Odor and Allergens: Mold emits a distinctive musty odor that spreads throughout your home, making your living conditions less pleasant. This odor is particularly difficult to remove, even after the mold has been eradicated. Moreover, mold releases allergens into the air that cause allergic reactions in sensitive individuals.
      • Decreased Indoor Air Quality: Mold spores reduce indoor air quality, leading to discomfort, headaches, fatigue, and difficulty concentrating. Poor air quality exacerbates existing health issues and impacts your overall quality of life.
      • Rapid Spread: Mold spreads rapidly if left untreated. Air currents easily carry spores and settle them in new areas, creating new growth sites and making them harder to control.
      • Contamination of Other Areas: Mold growth in one part of your home easily spreads to other areas through air circulation and cross-contamination. Ignoring mold in one room can lead to its appearance in multiple areas.
      • Property Value Decline: The presence of mold issues within your property negatively influences its overall value. Upon encountering signs of mold, prospective buyers often exhibit hesitancy and concerns. Addressing mold problems proactively not only safeguards the value of your property but also fosters a more positive market perception, potentially leading to more favorable outcomes during the selling process.
      • Increased Maintenance Costs: If mold continues to grow, the necessary repairs and renovations will become more extensive and costly. Catching mold early will save you money on repairs in the long run. 
      • Legal and Liability Concerns: Landlords are responsible for providing safe living conditions in rental properties. Neglecting mold issues may even result in legal action, including fines and penalties.
      • Financial Strain: Remediation and repairs for extensive mold problems place a considerable financial burden on homeowners. It’s more cost-effective to address the issue as soon as it’s detected.
      • Negative Aesthetics: The persistence of mold stains poses a challenge for complete removal, often leaving some residual discoloration despite cleaning efforts. This has a detrimental effect on the aesthetic appeal of surfaces such as walls and ceilings. The enduring discoloration may detract from the overall visual appeal of your living or working spaces, prompting a potential need for additional measures to restore the original appearance.
      Personal Belongings at Risk
      • Personal Belongings at Risk: Mold damages personal belongings like clothing, books, and electronics. Even if these items aren’t visibly affected, mold spores are released, potentially affecting your health.
      • Long-Term Health Effects: Prolonged mold exposure leads to more severe health conditions, including fungal infections, chronic respiratory issues, and even neurological problems in rare cases.
      • Exacerbation of Existing Conditions: Individuals with allergies or asthma may experience intensified symptoms due to mold exposure, requiring more aggressive treatment and management.
      • Chronic Fatigue and Cognitive Impairment: Mold exposure has been linked to chronic fatigue syndrome and cognitive impairments like memory issues, difficulty concentrating, and brain fog.
      • Heating and Cooling Efficiency: Mold growth in HVAC systems obstructs proper airflow, making your heating and cooling systems less efficient. This inefficiency increases energy costs and decreases comfort.
      • Inhabitability: In severe cases, extensive mold growth renders parts of your home uninhabitable until thorough remediation is completed, disrupting your daily life.
      • Insurance Complications: Mold issues lead to disputes with insurance companies, as some policies may not cover mold-related damages or remediation.
      • Vulnerable Populations: Mold poses a greater risk to vulnerable populations such as infants, children, the elderly, and individuals with compromised immune systems.
      • Emotional Toll: The ongoing struggle of dealing with mold issues, along with concerns about health, finances, and property value, takes a significant emotional toll on homeowners and their families. Anxiety, stress, and a sense of helplessness are common feelings associated with prolonged mold problems.

      In order to avoid all the potential problems mentioned above, you’ll want to contact a professional immediately for mold remediation. 

      When you hire a professional for mold remediation, here’s what to generally expect during the process:

      • Initial Assessment: The process begins with a comprehensive assessment of the affected areas. Professionals will inspect visible mold growth, identify the sources of moisture that contributed to the mold, and assess the potential risks to occupants’ health.
      • Scope of Work: Based on the assessment, the professionals will develop a detailed plan outlining the scope of the remediation work. This plan will include the areas to be treated, the methods to be used, and the timeline for completion.
      • Containment Setup: The experts will establish containment barriers using plastic sheeting and negative air machines to prevent cross-contamination. These barriers isolate the affected area from the rest of the property, ensuring mold spores don’t spread.
      • Personal Protective Equipment (PPE): The remediation team will suit up in appropriate PPE, which typically includes gloves, N95 respirator masks, protective eyewear, and possibly disposable coveralls.
      • Air Filtration: High-efficiency particulate air (HEPA) filters will capture airborne mold spores and prevent their circulation to other parts of the property.
      • Removal of Contaminated Materials: Materials heavily contaminated with mold, such as damaged drywall, insulation, and carpeting, will be carefully removed and double-bagged in heavy plastic for proper disposal.
      • Cleaning and Disinfection: Remaining surfaces will undergo thorough cleaning using specialized cleaning agents designed to remove mold growth. HEPA vacuuming might also be used to ensure any loose spores are captured.
      • Antifungal Treatment: In some cases, a biocide or antimicrobial treatment might be applied to surfaces after cleaning to hinder future mold growth.
      • Drying and Dehumidification: Effective moisture control is essential for preventing mold reinfestation. Professionals may deploy dehumidifiers and fans to ensure the area is adequately dried.
      • Verification and Testing: After remediation, the professionals will conduct a final visual inspection to ensure the mold has been effectively removed. In some cases, they might use moisture meters and perform air quality testing to confirm the success of the remediation.
      • Post-Remediation Testing: Depending on the extent of the mold issue and local regulations, a third-party inspector might conduct post-remediation testing to validate that mold levels have been reduced to acceptable levels.
      • Preventive Measures: Remediation professionals may provide recommendations for preventing future mold growth. This might include addressing issues like improving ventilation, repairing leaks, and maintaining proper humidity levels.
      • Documentation: Upon completion, you might receive documentation outlining the work performed, the methods used, and testing results. This documentation is important for insurance claims or property records.
      • Reconstruction: If significant building materials were removed during the remediation process, you might need to engage a contractor for reconstruction. This could involve replacing drywall, insulation, or other structural components.
      • Clearance Certificate: Once all remediation activities are finalized, and the area has passed testing, you might receive a clearance certificate affirming that the property is safe for reoccupation.
      Clearance Certificate

      Effective communication between you and the remediation professionals is crucial throughout the process. A back-and-forth flow of information ensures that you are consistently updated on the ongoing progress, any alterations in the plan that might arise, and any requisite precautions that need to be taken to ensure the smooth execution of the remediation process.

      By fostering open lines of communication, you establish a collaborative environment that empowers you to remain well-informed, make informed decisions, and actively engage in the process. Moreover, this proactive approach fosters a sense of transparency, trust, and partnership with the remediation experts, ultimately contributing to the efficacy and success of the remediation efforts.

      Black Diamond Restoration Is Your Mold Remediation Company

      Should you find yourself grappling with a mold issue within your home, time is of the essence. Contact Black Diamond Restoration today for a swift and efficient solution to your mold remediation needs. 

      Our team of seasoned professionals has the expertise, skills, and cutting-edge equipment to not only eliminate mold but also prevent any further damage with precision.

      We pride ourselves on fostering a collaborative partnership with you and your insurance provider, ensuring a seamless, cost-effective, and stress-free remediation process. 

      The health and security of your family and property are paramount, and with this in mind, we implore you not to leave them to chance. Contact us on our site or call 801-797-2502 to schedule a consultation. By taking this proactive step, you’re safeguarding your home against the potential threats mold poses.

      6 Steps Involved in the Natural Disaster Restoration Process

      Natural disasters can wreak havoc on communities, leaving behind a trail of destruction that requires extensive restoration efforts. 

      From hurricanes and floods to wildfires and earthquakes, these events can devastate homes, infrastructure, and the environment. In the aftermath, the task of restoring the affected areas can be daunting, requiring careful planning, coordination, and expertise.

      Today’s blog covers everything you need to know about natural disaster restoration, including understanding the most common natural disaster types, how restoration works, the steps involved in restoration, and why you should hire a natural disaster restoration company instead of trying to clean up on your own. 

      Types of Natural Disasters

      Common natural disaster types include flooding, hurricanes or cyclones, earthquakes, wildfires, and tornadoes. Here is a brief description of each natural disaster type and what causes them:

      1. Flooding: Flooding occurs when there is an overflow of water onto normally dry land. It can be caused by heavy rainfall, snowmelt, dam failure, or tsunamis.
      2. Hurricanes/Cyclones: Hurricanes, also known as cyclones or typhoons, depending on the region, are large tropical cyclonic storms characterized by strong winds and heavy rainfall. They form over warm ocean waters and are fueled by moisture and rising warm air. The collisions of different air masses and pressure differences trigger the formation and intensification of hurricanes.
      3. Earthquakes: Earthquakes occur when there is a sudden release of energy in the Earth’s crust, resulting in ground shaking. The movement of tectonic plates primarily causes them. When the stress accumulated along fault lines exceeds the strength of the rocks, it leads to rupture and an earthquake.
      4. Wildfires: Wildfires are uncontrolled fires that rapidly spread across vegetated areas, such as forests or grasslands. Natural factors like lightning strikes or human activities like arson, campfires, or improper disposal of cigarettes can cause them.
      5. Tornadoes: Tornadoes are violent rotating air columns extending from the base of a thunderstorm cloud to the ground. They form in severe thunderstorms when there is significant wind shear and atmospheric instability. 

      Understanding the natural disaster types is key to creating emergency preparedness plans to protect your family from future natural disasters. 

      Natural disaster isometric concept vector illustration in blue.

      The Role of Natural Disaster Restoration

      Natural disaster restoration is the process of repairing, reconstructing, and restoring the impacted structures and communities in the aftermath of a natural disaster. The primary purpose of natural disaster restoration is to restore normalcy to the lives of those affected by the disaster and enable them to recover from the devastating effects of the disaster.

      Prompt and efficient restoration is critical in minimizing the impact of natural disasters on people’s lives, properties, and communities. Natural disasters can cause immense damage to buildings, roads, bridges, and other essential infrastructure, disrupting people’s lives and triggering economic losses. 

      Timely and effective restoration helps to address these damages quickly, restore order, and reduce the suffering and chaos that disasters can cause.

      Additionally, natural disaster restoration plays a significant role in returning an area to its pre-disaster state and improving its resilience to future disasters. Restoration efforts should be designed to fix the immediate damage caused by natural disasters and improve the strength and resilience of the affected structures and communities. 

      Restoration should incorporate modern engineering and construction techniques to enhance the durability and longevity of infrastructure, making it able to withstand future disasters.

      Steps in the Restoration Process

      1. Initial assessment and planning: The first step in the restoration process is conducting a thorough evaluation of the affected area. This involves evaluating the extent of the damage, identifying necessary repairs, and developing a comprehensive restoration plan. This assessment helps prioritize tasks, allocate resources effectively, and ensure a systematic approach to the restoration process.
      2. Securing the affected area: After the initial assessment, the next step is to secure the affected area to prevent further damage and ensure safety. This may involve erecting temporary fencing, placing warning signs, or setting up barriers to restrict access to dangerous areas. Securing the area helps protect both restoration workers and the public from potential hazards.
      3. Removal of debris and hazardous materials: Removing debris and hazardous materials is a critical step in the restoration process. Debris, such as fallen trees, damaged structures, and rubble, must be cleared to create a safe working environment and facilitate further restoration efforts. 
        Hazardous materials, such as asbestos or chemical spills, must be carefully removed and disposed of following appropriate regulations to mitigate health and environmental risks.
      4. Structural repairs and reconstruction: This step involves repairing or reconstructing the damaged structures and infrastructure. It may include repairing roofs, walls, electrical systems, plumbing, roads, bridges, and other essential components. Restoration teams, including engineers and construction professionals, work to ensure that repairs are done according to safety standards and building codes and that the structures can withstand future disasters.
      5. Cleaning and sanitization: After the structural repairs are complete, thorough cleaning and sanitization are necessary to remove any residue or contaminants left by the disaster. This includes disinfecting surfaces, removing mold or mildew, and addressing any environmental concerns related to the disaster. Cleaning and sanitization procedures are crucial in creating a safe and healthy living environment for residents and restoring the affected area to its pre-disaster state.
      6. Restoring utilities and essential services: Restoration efforts also focus on restoring utilities and essential services, such as electricity, water supply, sewage systems, telecommunications, and transportation networks. 

      This involves repairing or replacing damaged utility infrastructure and ensuring that vital services are fully functional. Restoring utilities and essential services is essential for the smooth recovery of communities and facilitating the return to normalcy for affected residents.

      Each step is interconnected and requires coordination among various professionals and organizations involved in the restoration process. The goal is to restore the affected area to its pre-disaster condition, ensuring the community’s safety, well-being, and functionality.

      The 6 Steps Involved in the Natural Disaster Restoration Process

      Challenges of Natural Disaster Restoration

      Limited resources and manpower: One of the significant challenges in natural disaster restoration is the limited availability of resources and manpower. 

      During large-scale disasters, there may be a shortage of equipment, building materials, and skilled laborers needed for the restoration process. The demand for resources often exceeds the supply, leading to delays and inefficiencies. Coordinating and mobilizing resources effectively becomes crucial to overcome this challenge in a timely manner.

      Environmental and health concerns: Natural disasters can result in environmental and health hazards that complicate the restoration process. For example, floodwaters may carry contaminants, debris may contain hazardous materials, and damaged infrastructure may pose safety risks. 

      Restoration efforts must address these concerns through proper waste management, decontamination, and ensuring worker safety. Environmental impact assessments and adherence to health and safety protocols play a vital role in overcoming these challenges.

      Financial implications and insurance aspects: Restoring the areas affected by natural disasters involves significant financial implications. 

      The costs associated with repairing and rebuilding infrastructure, providing emergency relief services, and addressing long-term recovery needs can be immense. Public entities, private organizations, and insurance companies often bear these financial burdens. 

      The availability and adequacy of insurance coverage and the speed and effectiveness of claims processing can impact restoration efforts. 

      Hiring Professional Restoration Services

      Hiring professional restoration services offers several benefits, including:

      • Expertise and experience.
      • Efficiency and speed.
      • Comprehensive restoration solutions.
      • Safety and compliance.
      • Insurance coordination.

      Hiring a professional restoration company takes these burdens off you, allowing you to focus on other important parts of the restoration process.

      When hiring a professional restoration company, you’ll want to look for the following qualities:

      • Licenses and certifications.
      • Reputation and experience.
      • Range of services.
      • Response time and availability.
      • Insurance and documentation support.
      • Cost and transparency.

      By considering these factors, you can select a reputable and reliable restoration company that meets your specific needs and ensures a successful recovery from a natural disaster.

      Call Black Diamond Restoration Today

      When it comes to natural disaster restoration, trust the experts at Black Diamond Restoration to be your go-to source. With our years of experience, comprehensive range of services, and commitment to excellence, we are dedicated to helping communities rebuild and recover from the devastating effects of natural disasters.

      Discover how our skilled professionals can assist you through every stage of the restoration process. From assessing damages and developing customized plans to executing the work efficiently and safely, we have the expertise and resources to restore your property to its pre-disaster condition.

      At Black Diamond Restoration, we understand the urgency and complexity of natural disaster recovery. Our team is available 24/7, ready to respond quickly and effectively to restore normalcy in your life. Let us guide you through the challenges, mitigate environmental and health concerns, and ensure a streamlined insurance process.

      Don’t face the daunting task of restoration alone. Choose Black Diamond Restoration as your trusted partner in rebuilding after disaster strikes. Call us today at 801.905.8062 or visit our website to learn more about our services and how we can assist you.

      Here’s Your Timeline For Taking Care of Smoke Damage

      Smoke damage can be a distressing and overwhelming issue to deal with in your home. Whether it’s the result of a minor kitchen mishap or a larger-scale fire incident, addressing smoke damage promptly and efficiently is crucial to preventing further deterioration and ensuring the safety and comfort of your living space.

      Dealing with smoke damage in your home requires a meticulous and comprehensive approach to ensure that every aspect of the restoration process is handled effectively. From the initial assessment to the final steps of reoccupation and prevention, each phase plays a crucial role in restoring your living space to its pre-damage condition. 

      This article will show you a comprehensive timeline that will guide you through assessing and repairing smoke damage in your home, providing detailed insights into each stage of the journey. 

      the most common causes of smoke damage: 

      But first, we will go over the most common causes of smoke damage: 

      Smoke damage can result from various incidents, both minor and catastrophic. The causes of smoke damage vary, ranging from household accidents to larger-scale fire emergencies. Understanding the common causes and their specific details is essential for prevention and preparedness.

      1. Cooking Accidents: Cooking accidents are among the most frequent causes of smoke damage. Unattended pots, overheated oil, or food left on the stove can lead to smoke and subsequent damage. The smoke produced can spread quickly, leaving a residue on surfaces, walls, and ceilings.

      2. Electrical Fires: Electrical fires often originate from faulty wiring, overloaded circuits, or malfunctioning appliances. The resulting smoke can be thick and toxic, leaving visible residue and potentially harmful particles that require thorough cleaning.

      3. Heating Systems: Malfunctioning heating systems, such as furnaces or space heaters, can generate smoke due to dust buildup, debris, or mechanical failures. Smoke can infiltrate your home’s ventilation system, spreading damage to various rooms.

      4. Candle Mishaps: While candles are commonly used for ambiance, they can inadvertently lead to smoke damage if not handled properly. Overly large or improperly placed candles can generate excessive smoke, leaving residue on nearby surfaces and walls.

      5. Fireplace Issues: When not maintained or operated correctly, fireplaces can release smoke into your living space. Factors like using wet wood, poor chimney ventilation, or flue blockages can cause excessive smoke to billow back into the home, depositing soot and residue.

      6. Kitchen Fires: Kitchen fires, often ignited by grease or oil, can escalate quickly and produce substantial smoke. The resulting residue can be stubborn and pervasive, affecting the immediate area and adjacent rooms.

      7. Smoking Indoors: Smoking indoors generates harmful secondhand smoke and leaves behind nicotine stains and a distinct odor. The residue from smoking can settle on surfaces, furniture, and walls, requiring specialized cleaning methods.

      8. Dryer Vent Blockages: Blocked dryer vents can cause heat and smoke to accumulate, posing a fire hazard. The resulting smoke damage can be particularly challenging to address due to the widespread residue distribution through your home’s ventilation system.

      9. Accidental Ignition: Miscellaneous accidents, such as knocking over a candle or leaving a hot iron unattended, can cause small fires that produce excessive smoke. Even minor incidents can result in smoke damage that necessitates thorough cleaning and restoration.

      10. Arson and Intentional Fires: Intentional acts of arson or vandalism can cause significant smoke damage. These incidents often involve the combustion of various materials, producing a mix of toxic smoke particles that can infiltrate every corner of your home.

      11. Appliance Malfunctions: Faulty appliances, such as dishwashers, washing machines, or electronics, can generate smoke due to overheating or electrical issues. The smoke produced from these malfunctions can spread quickly, necessitating prompt intervention.

      12. Electrical Shorts: Short circuits in wiring systems can spark fires that emit smoke. The smoke generated can contain harmful chemicals, necessitating thorough cleaning and restoration to eliminate potential health hazards.

      13. Overheating Electronics: Overheated electronics, such as laptops or charging devices left on flammable surfaces, can lead to localized fires and smoke. The resulting residue can affect the immediate area and adjacent rooms.

      14. Natural Disasters: Natural disasters like wildfires can also cause smoke damage, even if your home isn’t directly affected by flames. Excessive smoke from nearby fires can infiltrate your home, leaving soot and residue on surfaces and belongings.

      15. Chemical Reactions: Certain chemical reactions, such as mixing household cleaners, can result in smoke and fumes that deposit residue on nearby surfaces. These residues often require specific cleaning techniques to ensure complete removal.

      Understanding the diverse causes of smoke damage and their specific characteristics is crucial for taking preventive measures and responding effectively to incidents. By practicing caution, maintaining your home’s systems, and being prepared to address smoke damage, you can minimize the risk and impact of these common occurrences.

      Comprehensive timeline of what to expect, start to finish, when dealing with smoke damage: 

      Now, let’s take a look at the comprehensive timeline of what to expect, start to finish, when dealing with smoke damage: 

      Day 1-2: Initial Discovery and Safety Measures As soon as you discover smoke damage, prioritize safety. If it’s due to a recent fire, confirm that the fire department has extinguished the flames and the area is safe to enter. For minor incidents, open windows and doors to enhance ventilation. Wear appropriate protective gear, such as masks and gloves, when assessing the damage to avoid exposure to potentially harmful particles.

      Day 3-4: Documenting the Damage Begin documenting the extent of the smoke damage by taking detailed photographs and videos. Capture close-ups of affected surfaces, belongings, and structural elements. These visual records will serve as essential evidence for insurance claims and restoration assessment.

      Day 5-7: Contacting Insurance and Restoration Professionals Contact your insurance provider to initiate the claims process. Understand your policy coverage, deductible, and claim procedures. Concurrently, reach out to professional restoration companies experienced in smoke damage restoration. Request on-site evaluations to obtain accurate estimates for the restoration work.

      Day 8-14: Professional Assessment and Plan Development Restoration professionals comprehensively assess the smoke damage. They identify different types of smoke residue and evaluate their impact on various materials. Based on this assessment, the restoration company develops a detailed plan outlining the restoration process, materials required, and a tentative timeline.

      Day 15-21: Insurance Claims and Approval Gather all necessary documentation, including photographs, assessment reports, and repair estimates, to submit a detailed insurance claim. Work closely with your insurance adjuster, providing any requested information promptly. Once the claim is approved, you can proceed with the restoration plan.

      Day 22-28: Smoke Residue Removal and Surface Cleaning The restoration process starts with removing smoke residue from surfaces. Professionals use specialized cleaning agents and techniques tailored to the type of residue and material. They meticulously clean walls, ceilings, floors, and personal belongings to eliminate visible and hidden smoke particles.

      Day 29-35: Structural Repairs and Material Replacement Structural repairs begin, involving replacing damaged building materials. This phase may include replacing drywall, insulation, flooring, and other components that have suffered extensive damage. Skilled professionals ensure that repairs align with the existing design and structural integrity.

      Day 36-42: Deodorization and Odor Removal To address persistent odors, restoration professionals employ various methods such as ozone treatment, thermal fogging, and advanced air purification systems. These techniques neutralize odor-causing particles, leaving your home smelling fresh and clean.

      Day 43-49: Electronics and HVAC System Cleaning Electronics and HVAC systems are prone to accumulating smoke particles. Professionals clean and test electronic devices to restore functionality. Cleaning the HVAC system, including ducts and filters, prevents the recirculation of lingering smoke particles and ensures improved indoor air quality.

      Day 50-56: Personal Belongings Restoration Your personal belongings undergo meticulous cleaning and restoration. This phase includes clothing, upholstery, electronics, and sentimental items. Collaboration with restoration experts helps prioritize items with significant emotional value for careful restoration.

      Day 57-63: Final Inspection and Quality Control The restoration process nears completion with a final inspection. Professionals ensure that all smoke damage has been addressed and perform any necessary touch-ups or repairs. This phase is critical to achieving a seamless and well-executed restoration.

      Day 64-70: Air Quality Testing and Reoccupation Preparation Consider having professionals conduct air quality testing to ensure a healthy indoor environment. Clean all surfaces, launder fabrics, and verify that safety systems like smoke detectors and fire extinguishers are fully operational. Prepare your home for reoccupation by restoring a clean, safe, and odor-free environment.

      Day 71-77: Reviewing and Closing Insurance Claims Thoroughly review the documentation provided by restoration professionals to ensure all restoration work aligns with your expectations. Collaborate with your insurance provider to finalize and close the claims process, keeping copies of all documentation for your records.

      Day 78-Onward: Preventive Measures and Future Preparedness After successful smoke damage restoration, focus on preventive measures to reduce the risk of future incidents. Regularly inspect and maintain smoke detectors, fire alarms, and fire extinguishers. Educate your family on fire safety practices, develop an emergency plan, and consider fire prevention consultations for additional insights.

      Navigating smoke damage restoration involves a detailed and time-intensive process. By meticulously following this timeline, collaborating closely with professionals, and maintaining open communication with your insurance provider, you can ensure a comprehensive recovery process that restores your home to a safe, comfortable, and pristine condition.

      Get Rid of Smoke Damage with Black Diamond Water Damage and Disaster Restoration

      Get Rid of Smoke Damage with Black Diamond Water Damage and Disaster Restoration

      With a commitment to providing top-notch service, Black Diamond Water Damage and Disaster Restoration offers you and your home the best smoke damage restoration services. 
      Trust the professionals at Black Diamond Restoration for efficient, effective, and reliable smoke damage removal. Contact us or call 801-383-0964 to learn more!